I am so excited to talk about all of the acrylic pour techniques, and since there are soooo many, I have broken it down and also provided a table of contents to keep things nice and organized for you! Enjoy!
This post contains affiliate links, which I earn a small comission from. These are provided for your convenience, and the price isn’t increased at all.
What is acrylic pouring?
For our paint pouring beginners, in order to explain exactly what acrylic pouring is, we first need to discuss fluid art. Fluid art includes art forms where the medium is a liquid or a fluid. Media of fluid art include resin, alcohol ink, acrylic paints.
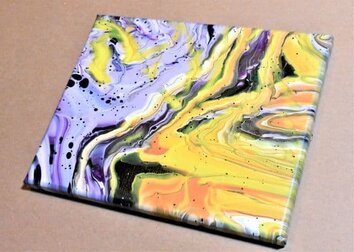
In acrylic pouring, the acrylic paint is thinned down with what’s called a medium. Basically, this is the substance that allows the paint to flow across the canvas. Rather than being applied with a brush, as in traditional painting, the paint in acrylic paint pouring is applied by being poured onto the canvas (hence the name “acrylic pouring”).
The results of acrylic pouring vary widely depending upon the acrylic pour technique used to apply the paint. This comprehensive paint pouring technique guide will cover nearly all of the ways that you can create acrylic pouring art and the types of results you can expect based upon the acrylic pour technique used.
What do you need for acrylic pour painting?
The supplies needed for each of the different acrylic pour techniques vary slightly, but there is a basic set of supplies that you’ll need for any acrylic flow painting technique, which I’ll list below under basic supplies. You’ll find any additional supplies needed for a specific acrylic pour technique in the description for that type of pour below.
Basic Supplies
- Acrylic Paint
- Medium: Common mediums include Floetrol, Liquitex Pouring Medium, Elmer’s Glue-All, and PVA glue
- Water: Water is usually used to some degree in thinning the paint.
- Canvas: This can be an actual canvas or anything else you wish to paint.
- Cups: You need to have something to mix your paints in, and they’re handy for elevating your paintings so they don’t stick to whatever they’re drying on.
- Stir Sticks: Popsicle sticks are the most accessible stir sticks.
- Table Cover: This can be a messy art form, so you’ll want to protect your table. Some things that you can use are plastic tablecloths, trash bags, butch paper, or if you’re planning on doing a few paintings, you can repurpose a tupperware bin to pour in.
- Gloves: This is a messy art form, so you may choose to wear gloves.
- A place for the painting to dry for at least a few days, at least until the paint is dry to the touch.
If you’re looking to expand your medium horizons, check out my How to Thin Acrylic Paint for Acrylic Pouring post, which also lists every pouring medium that I could possibly find to help you see what your options are all in one place!
If you want to know more about the tools I use and love, grab my FREE acrylic pouring tool guide, where I share my 10 favorite tools. They’re cheap and save a lot of time and hassle!
Optional Supplies
If you spend any amount of time studying acrylic pour painting, you’ll find that there are a number of additives that people introduce to their paints to achieve different effects, generally cells (pockets of color that are different from the surrounding paint color). I personally have not used these as I haven’t had a problem with achieving these effects with the recipe I outline below. However, if you’re looking to experiment, I will list some additives I’ve seen people use below.
- Dimethicone silicone
- Silicone Oil
- Isopropyl alcohol
If you’re interested in learning more about additives for acrylic pouring, check out this blog post on the Best Additives for Acrylic Pouring over at acrylicpouring.com. Just be sure to take care when you are using additives because many of them need to be cleaned off of the painting once it’s dry and could possibly affect the archival nature of your paint.
You can also create cells and get different effects by using a torch on your paint. I’ve played with this a little bit, and it’s pretty fun. I honestly just don’t pull out the fire too much because kids.
- Butane torch (the small ones that they use for cooking is generally what’s used)
Here’s an article about How to Use a Butane Torch for Acrylic Pouring Art, if you’re curious about that as well.
Mixing your Paint
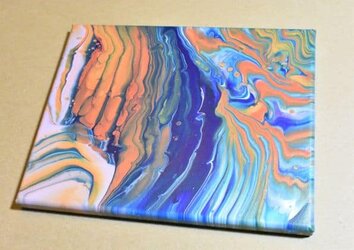
There are many different “recipes” out there for acrylic paint pouring, and really, this is something that if you stick with this art form, you’ll adjust as time goes on and fit it to your style and preferences.
Here’s the basic acrylic pouring recipe that I use:
- 1 part paint
- 2 parts Floetrol (that’s my medium of choice currently)
- Splash of water
Here’s the thing, this is going to vary depending on the type of paint you’re using. Different brands have different consistencies. What I do is mix the paint and the Floetrol in the ratios above and then add just a slight bit of water until I reach the consistency I like. I prefer my consistency to be something like pancake batter for most acrylic pour techniques.
I use tap water, despite some people’s recommendations to use distilled because I’ve never had an issue and it’s easy. I encourage you to use your best judgement and do some research on it for yourself if you’re concerned about it. Maybe I’ll add it to the list of experiments I want to do in the future.
Tips
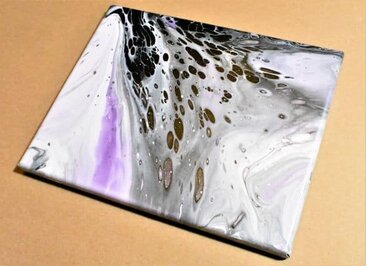
A couple of notes before we get started with all of the acrylic pour techniques. Some of these require a base coat of paint on the canvas to help your paint flow more easily, but you can add a base coat to any of these to do the same thing and it won’t hurt. In fact, it will probably only help your pour.
Most of these videos are from my 30-day color theory series that I did. It’s a really fun series, so you should grab your free printable Color Wheel and 8 Color Scheme Guides and follow along! It’s also a great tool if you’re not always sure how to match colors or if you’re looking for some new color combos you may not have otherwise thought of. You can also check out my color theory post for more information on choosing colors for your pours.
If you’re interested in a particular pour from one of my videos and the paints and supplies I used, I’ve linked to the post for that video in the title of the pour.
Acrylic Pour Techniques
Now that we’ve got down what acrylic pouring is and the tools you need to do it, we can get into the fun stuff and talk about all of the different ways to make beautiful art! I have compiled this list of as many acrylic pour techniques as I could, and I am going to try to keep this as up-to-date with new acrylic pour techniques as possible, but if you think I’m missing something, let me know and I will totally look into it!
Clean/Traditional Pour
A clean or traditional pour is the most simple type of pour. It is achieved by pouring different colors of paint onto a canvas separately and then moving and tilting the canvas until the desired result is achieved.
Dirty-cup Pour
A dirty-cup pour, in contrast to a clean pour, is where the colors intersect and form cells and patterns amongst themselves. To do a dirty cup pour, you’ll want to fill your cup with paint by pouring the colors into one another at different heights and speeds to vary the amount that the paints mix together. Then, you simply pour this out onto the canvas and let the paint do its thing!
I also sometimes refer to this as a ribbon pour because it creates beautiful ribbons of color.
Flip-cup Pour
A flip-cup pour is basically a dirty-cup pour where you let gravity help you out. To achieve this acrylic pour technique, which is one of my favorites, prepare your paint cup as you would for the dirty-cup pour above, then set your canvas on top of the cup face-down and flip. Release the paint when you feel it’s settled to the canvas and tilt as you’d like.
You can also do a quick flip of the paint cup if your canvas is large, or you can put a piece of cardboard on the top of the cup, flip it and slide it off.
Flip-and-drag Pour
The flip-and-drag pour is a flip-cup pour where you drag the cup across the canvas before you release it.
Floating-cup Pour
A floating-cup is similar to a flip-cup pour, but you have a base coat of paint down before you flip the cup. Then you can poke a hole in the top of your cup to release the pressure so you can slowly move the cup around, dragging the paint, or you can just slowly lift the cup as you drag it.
This acrylic pour technique creates a lot of cells and lacing as well as movement in your piece.
Open-cup Pour
An open-cup pour is along the same lines of a dirty-cup pour except that you use a cylindrical object, like a cup with the bottom cut off or a toilet paper roll cut down, to pour the paint into and directly onto the canvas. You’ll want to add a base coat to this one to aid with the flow, and as you go, you may need to adjust the cylinder and lift it slightly to let the paint escape.
Puddle Pour
A puddle pour is similar to a clean pour in that the paints are not mixed in the cup. You’ll start by pouring puddles of color onto your canvas as you’d like and layering the colors as you prefer. Then tilt the canvas to meld the colors into one another and create patterns.
Swipe Pour
A swipe pour is where you lay the paint down on the canvas and then use something to swipe a thin layer of paint over the entire piece. You can use lots of different things to swipe, like paper towels, wet or dry, baby wipes (my favorite), spackle knives, old credit/gift cards (another one of my favorites), etc.
Starburst Swipe
The starburst swipe is a version of a swipe where the colors are layered from the inside out in concentric circles. Then you swipe in small sections from the center of the canvas toward the outside edges, all the way around the canvas.
Wave Pour
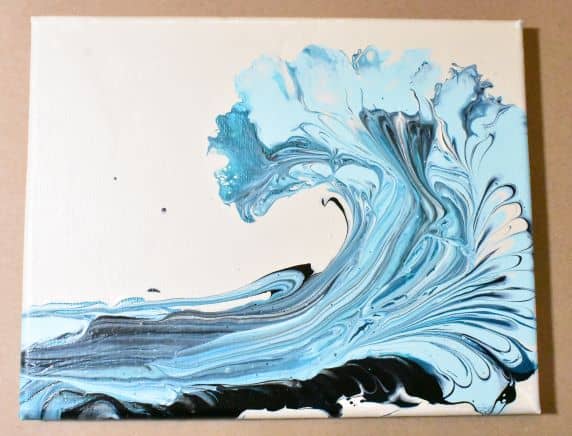
A wave pour is a form of intentional pouring utilizing the swipe method. This is a technique that I’ve played with a lot, so if you’re interested in different variations on this, check out my nature-inspired pours.
For this one, you’ll want to lay out your ocean colors in the shape of the wave. Then swipe your colors either from the curl of the wave or the ocean horizon. You can start at either side, but the goal is to have one continuous swipe to mimic the motion of the wave. Don’t forget to add some white for the foam on the wave to give it some dimension. This wave pour by YouTube Artist
CraftyJenn is awesome!
Ghost Pour
A ghost pour is a version of the swipe pour where the colors are laid out in a line along the middle of the painting on top of a thin base coat. Then the colors are swiped outward toward the edges of the canvas perpendicular to the initial line of colors. Usually, there are more than one swipe going down the middle that mirror each other on either side of the initial line of colors.
Tree Ring Pour
A tree ring pour is where layers of color are carefully layered in a cup by pouring the paint down the side of the cup to form distinct layers. This cup is then poured slowly in a circular motion in one spot. Once the paint is poured out, the canvas is then tilted in a circular motion to stretch out the tree ring image within the paint.
I actually love to use latex house paint to do this technique because one of the cons of this technique is that you actually don’t want too many cells because it can be distracted. If you want to know more about using latex paint with this technique, check out this tree ring pour.
Wreck-a-ring Pour
A wreck-a-ring pour is a riff on the classic tree ring pour that adds more detail and dimension to the pour. After you’ve done the steps outlined above for the tree ring pour but before you stretch and tilt your paint, use an object (your finger, popsicle stick, whatever you have on hand) to run thin lines through your paint. When you tilt and stretch the paint, these lines will create interesting, intricate details and division in your work.
Traveling Ring Pour
Another riff on the ring pour is the traveling ring pour. All you do to achieve this cool effect is when you’re pouring your paint out, keep moving your puddle ever so slightly along the canvas.
There’s a lot of movement and layering details with this technique that I really like.
Bottle-bottom Pour
If you drink any kind of beverage that comes in those dimpled bottom bottles, don’t throw them out! They come in handy for this pour. Cut the bottom off and you’ve got a handy new pouring tool!
This technique is super simple. All you do is pour layers of paint onto the center of your handy new tool. When you lift it up, you’ll have a flower-like shape. You can then take a popsicle stick or the like and pull lines through the petals to complete the look.
If you’re not into the literal flower look, you can also tilt the painting once you’ve removed the tool to stretch the paint in different ways.
The one downside of this technique would be that it can be tricky to get the center to look right, so it does take some practice.
String Pull
String pulling is an interesting technique that uses a string coated in paint to create different effects. As you’ll see in this acrylic pour techniques guide, the string pull technique can be used to create a number of different images and effects.
For this technique, you’ll want to lay down a thin coat of paint for the background so that the paint on your string has something to flow into. Coat the string or strings in paint and place them on the canvas. Then pull one end of the string toward the edge of the canvas, dragging the paint on the string through the base coat.
String Pull Feather
For the feather, you will either use two strings or the same string twice. Lay the string out and drag one end of the string down toward the other end. Repeat going the opposite way. Then using a popsicle stick, drag a line of paint down the center of the feather to complete it.
Chain Pull
A chain pull is the same thing as a string pull, the only difference being that you use a chain of some type rather than a string. You will get different results and effects depending on the type and size of the chain you use. Some ideas for chains are cheap costume jewelry, mardis gras beads, or fan pull chains.
Check out this awesome example by YouTube Artist Arts & Crafts!
Balloon Smash
The balloon smash is exactly what it sounds like, you lay down a thin layer of background paint, pour some puddles of paint and smash a semi-inflated balloon into them. The result is almost floral in nature. You can also use this technique in combination with other acrylic pour techniques like flip-cup and the like to create some different textures and focal points within a piece.
Funnel Pour
A funnel pour is a pour where the paint is applied via funnel. It produces really interesting effects due to the tapered nature of the funnel.
You usually start out by holding the funnel directly to the canvas and pouring the paint into the funnel. Then slowly lift the funnel to release the paint as you move it around the canvas.
Dutch Pour
The Dutch Pour, made famous by YouTube Artist Rinske Douna, is an acrylic pouring technique where you move the paint around with a hairdryer, which creates a lot of delicate lacing and fine details.
You have a base coat of a background color, lay down some color, put more of the base coat color around the color, and then use a hairdryer to bring that base coat color up and over the color. Once you’ve done that, you then fan the color out using the hair dryer.
Dustpan Pour
The dust pan pour is an interesting technique where you layer your paint in a dustpan and then move it about the canvas, distributing the paint as you go.
Kiss Pour
A kiss pour is a great way to make use of color theory and complimentary colors. You take two cups of paint, layered in any way that you’d like, either like a tree ring pour or more like a dirty-cup pour, and then pour them out onto the canvas so that the two puddles are just kissing. Then tilt and stretch the paint as you see fit.
Infinity Pour
The infinity pour, created by YouTube Artist Mixed Media Girl, is similar to the kiss pour but the colors end up overlapping a bit, which creates really interesting details and effects.
Prepare the paint as you would for a kiss pour. When you’re pouring the paint onto your canvas, move your hands in circles, overlapping the paint from each cup into the other’s puddle. Then, as with the kiss pour, tilt and stretch the paint as you see fit.
Dip
The dip technique makes use of suction between the paint and the canvas. It is another simple technique that I recommend to beginners because it is easy but produces beautiful, interesting results.
For a dip, you’ll want to have something on your table that you can get a decent amount of paint on. Lay the paint down on your painting surface. Flip the canvas over and dip it into the paint. Move the canvas around as much or as little as you would like, and then pull the canvas up out of the paint. Repeat as you’d like to get your desired results. I will note that the more you do it with the same paint, the more mixed your colors will be, so you will have less definition.
Reverse Dip
A reverse dip, as the name implies is the reverse of the dip technique. Rather than dipping the canvas into the paint, the paint is put on the canvas. Then something is applied to the paint and pulled off to create the suction that is characteristic of the dip technique. I generally use plastic cling wrap to execute this technique, but I’ve also seen paper towels and things like that used.
Reverse Spiral Dip
A reverse spiral dip is executed just as the reverse dip is. The difference lies in the way that the paint is laid out on the canvas. As the name would imply, it is laid out in a spiral pattern in this technique. Fiona Art is well known for her beautiful artwork with this technique.
Wing Pour
The wing pour is where you pour a stripe of white down the middle of colored paint and the paint flows in such a way that an image of what looks like wings is formed.
I personally think that this is a more advanced pour, but the results are undoubtedly stunning, so worth the practice. I tried this one during my 30-day color theory series, and frankly it failed to look like wings but ended up looking like some pretty cool geodes. So I’ve put a video by YoutTube Artist LansingGoals below that shares some of the pitfalls and techniques needed to get a good wing pour.
Two-cup Pour
A two cup-pour is achieved by gluing a smaller cup inside a larger cup. Then fill the space between the two cups with whatever colors you desire and the inner cup with one solid color. Pour as you would with a dirty-cup pour.
Split-cup Pour
A split cup pour is when you have a cup that is divided into different chambers. These chambers are then filled with their own paints. You can really do any technique with these types of cups, but they’re pretty popular for tree ring pours.
Strainer Pour
A strainer pour is when you pour your paints onto a perforated object. You can use a sink strainer, a colander, a slotted spoon, anything that has holes in it really.
Blob Painting
This is an interesting form of acrylic pour painting because it’s one where you actually don’t want your paint to move. You build up layers of paint in the form of blobs of different colors, and it creates a really interesting 3D piece of art.
I have not played with this one yet, but it is one that I hope to work with in the future. In the meantime, check out this awesome video by YouTube Artist Saskia Smit!
Hammer/Mallet Smash
This one is a super fun one! Although it can be messy, because it is just what it sounds like, you layer your paint on the canvas in puddles and then go at it with a hammer or a mallet. YouTube Artist Ann Osborne Art is awesome at this one!
Injection Pour
Also known as a web pour or an infusion pour, an injection pour is where you lay down your paint in one of the manners listed above and then use a squirt bottle to inject paint, usually white paint, underneath the paint you have on your canvas. Then you stretch it as you want.
Combining Acrylic Pour Techniques
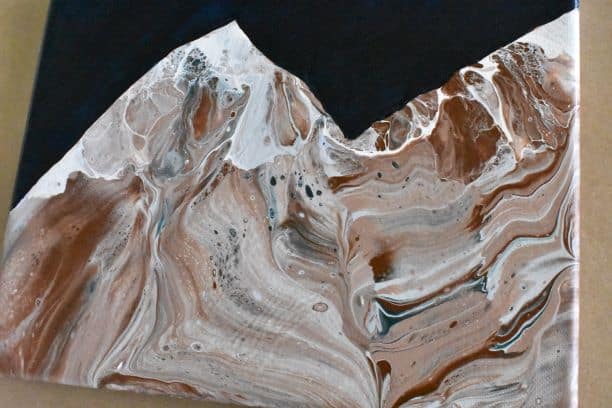
One of the awesome things about this artform is that the possibilities are pretty much endless, especially when you start combining the different acrylic pour techniques. Check out these three examples of combining acrylic pour techniques below! You can find these projects in my nature-inspired section!

Go Forth and Pour!
I hope that this comprehensive acrylic pour techniques guide really helps you get familiar with the art form and gives you some new ideas and inspiration. Don’t forget to grab your free printable color wheel and color scheme guides to help you with color inspiration!!
2024 Color Palettes for Creating Updated Art
Let’s Throw a Paint Party: How to Host Your Own Paint and Sip
Do It Yourself Countertop Paint: Update Your Kitchen With Pour Paint
Want to remember this awesome comprehensive guide on acrylic pouring? Be sure to pin this to your favorite Pinterest board!
