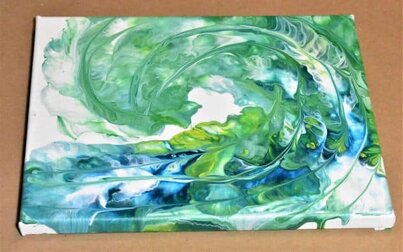
Day 19 of my acrylic pouring color theory series is an abstract wave acrylic pour painting. It started out as a wave swipe, but it kind of got away from me. So I decided to work in some different textures with a straw blown technique. And I really think it worked out well. It’s a bit different than the wave pours that are out there, but that’s what I really like about it.

If you’re curious about colors and color theory as it relates to acrylic pouring, head on over to my post about Choosing Colors for Acrylic Pouring and grab your FREE printable Color Wheel and Color Scheme Guides.
If you would like to follow along with my 30-day acrylic pouring color theory video series, grab your very own color wheel and color scheme guides and some paint, and head on over to the color theory section of Homebody Hall!
If you’re pouring for the first time and would like more explanation on materials, processes, and terms, you can head on over to my Beginner’s Guide to Acrylic Pouring. You can also head over to my Comprehensive Guide to Acrylic Pouring Techniques for more information on all of the different techniques and my How to Thin Acrylic Paint for Acrylic Pouring post to learn all about pouring mediums!
This post contains affiliate links, which I earn a small comission from. These are provided for your convenience, and the price isn’t increased at all.
Color of the Day (Day 19 – Wave Acrylic Pour Painting):
- Green
Color Scheme:
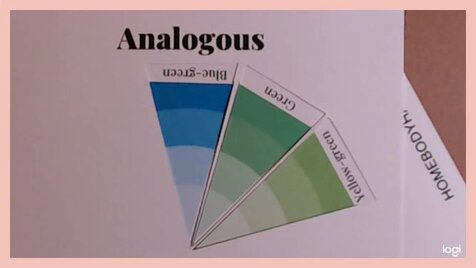
- Analogous – Green, Blue-green, Yellow-green

Shades Chosen:
- Green
- Blue-green
- Yellow-green
Neutral Chosen:
- White
Technique:
- Swipe
- Straw blown
Paints:
All of the colors I used were mixed from the paint colors below. (Blue and yellow for green, blue and green for blue-green, and yellow and green for yellow-green)
Pouring Medium:
- Floetrol
- Water
Canvas:
Tools:
- Torch (optional)
- Straw
- Skewer
Sealant:
- Rustoleum American Accents Gloss Clear (1 thin coat)
Wave Acrylic Pour Painting Step by Step
- Lay down a thick base coat of your background color. If you have a lot of bubbles, you may want to use a torch to get rid of them.
- Apply your colors in the shape of a wave. I used the darker color near the bottom for some depth
- Place a strip of white paint where the foam of the wave will sit.
- Using an old gift card or spackle knife or paper towel, whatever your swipe mechanism of choice is, and swipe your wave in one fluid motion. Continue swiping and adjusting as you need to get a wave that you like.
- Using a straw, blow out the edges of the wave and the insides if you would like. I really like how the air pushed the bright, vibrant colors out toward the forefront.
- If you want, you can take a skewer like I did and add some lines in to accen the movement. Because this was more of an abstract rendition of a wave, I had some fun and took some artistic liberties with it. Feel free to do the same!
Go Forth and Pour!
So there you have it, a superfun rendition of a wave acrylic pour of your very own! I hope you had so much fun with this project, and if you’re into ocean and beach things, check out the projects below!
As always, check out my updates on Facebook and Instagram and feel free to peruse Homebody Hall for more fluid art tips, tricks, and tutorials! Also head over to Youtube and subscribe to get my videos sent to you as soon as they come out!!
2024 Color Palettes for Creating Updated Art
Let’s Throw a Paint Party: How to Host Your Own Paint and Sip
Do It Yourself Countertop Paint: Update Your Kitchen With Pour Paint
Want to remember this? Pin Day 19 of this Acrylic Pouring Color Theory Series to your favorite Pinterest Board!


