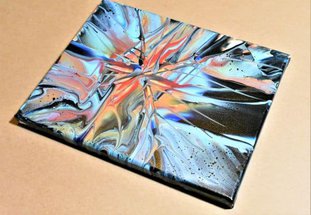
Day 23 of my acrylic pouring color theory series is an acrylic pour starburst swipe in a split complementary scheme. It doesn’t look like what I thought it would, but I like it. It draws attention and really uses line in an interesting way that keeps the eye moving around the piece. The color scheme works really well here, and you can see each of the colors in the piece.

If you’re curious about colors and color theory as it relates to acrylic pouring, head on over to my post about Choosing Colors for Acrylic Pouring and grab your FREE printable Color Wheel and Color Scheme Guides.
If you would like to follow along with my 30-day acrylic pouring color theory video series, grab your very own color wheel and color scheme guides and some paint, and head on over to the color theory section of Homebody Hall!
If you’re pouring for the first time and would like more explanation on materials, processes, and terms, you can head on over to my Beginner’s Guide to Acrylic Pouring. You can also head over to my Comprehensive Guide to Acrylic Pouring Techniques for more information on all of the different techniques and my How to Thin Acrylic Paint for Acrylic Pouring post to learn all about pouring mediums!
This post contains affiliate links, which I earn a small comission from. These are provided for your convenience, and the price isn’t increased at all.
Color of the Day (Day 23 – Acrylic Pour Starburst):
- Blue
Color Scheme:
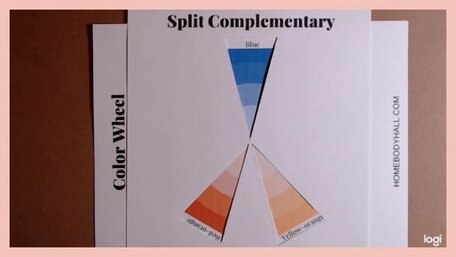
- Split Complementary – Blue, Red-Orange, Yellow-Orange

Shades Chosen:
- Blue
- Light Blue
- Red-Orange
- Yellow-Orange
Neutral Chosen:
- White
- Black
Technique:
- Acrylic Pour Starburst Swipe
Paints:
All of the colors I used were mixed from the paint colors below. (Red and orange (yellow and red for orange) for red-orange, yellow and orange for yellow-orange, and white and blue for light blue)
- Artist’s Loft Brilliant Blue
- Artist’s Loft Brilliant Yellow
- Artist’s Loft Deep Red
- Liquitex Basics Titanium White
- Master’s Touch Permanent Black
Pouring Medium:
- Floetrol
- Water
Canvas:
Tools:
- Swipe tool (spackle knife, old gift/credit card)
- Skewer or popsicle stick
Sealant:
- Rustoleum American Accents Gloss Clear (1 thin coat)
Acrylic Pour Starburst Step by Step
- Start with a puddle of your center color. In my case this was the yellow-orange.
- Pour concentric circles of your colors around that center puddle. The order for my colors around the yellow-orange was: red-orange, light blue, blue, black. I also went back in and added white to the center puddle of yellow-orange as a highlight.
- Using your favorite swipe tool, swipe from the center out toward the edges of the canvas. Make sure to wipe your swipe tool after each swipe to keep the colors clean.
- I continued with another round of swipes because I wanted more of the black to show through.
- At the end of your acrylic pour starburst painting, you can choose whether or not you want to go in and add some finer details with a popsicle stick or a skewer. I continued to work on this painting quite a bit to get something that I was pleased with. I also added additional red-orange for a more defined center, so that’s also something that you can do as well.
Go Forth and Pour!
And there you have an acrylic pour starburst, another version of the swipe technique! Super fun and a little bit different!
As always, check out my updates on Facebook and Instagram and feel free to peruse Homebody Hall for more fluid art tips, tricks, and tutorials! Also head over to Youtube and subscribe to get my videos sent to you as soon as they come out!!
And now you can joing my Facebook Group, Flourishing Fluid Arts with Homebody Hall and get help, tips, inspiration and just hang out and have a great time!
2024 Color Palettes for Creating Updated Art
Let’s Throw a Paint Party: How to Host Your Own Paint and Sip
Do It Yourself Countertop Paint: Update Your Kitchen With Pour Paint
Want to remember this? Pin Day 23 of this Acrylic Pouring Color Theory Video Series to your favorite Pinterest Board!


