Looking for something fun to do with your kids? In this post, I’ll show you how to make some easy, fun kids paintings on canvas with acrylic pouring! Great for the whole family!
What does painting do for a child?
You may be wondering why you would want to paint with your kids and if it’s worth the mess. Well, there’s lots of benefits to painting for your kids, and I’ve got you covered with ways to reduce the risk of mess greatly! Some of the benefits of kids painting are:
- Working on hand-eye coordination
- Exploring color
- Learning about mixing colors
- Having fun!
- Spending time together!
- Working on motor skills
- Developing creativity
- Problem-solving
- Exploring processes and outcomes
What kind of paint do you use for kids?
Obviously, normally for acrylic pouring, you use acrylic paint. I typically use the student level tubes of acrylic pouring. Acrylic paint is permanent when dry.
So when you’re painting with your children, you may want to use something else because kids will be kids and as many precautions as you take (and I will show you some really good setup tips), paint will end up somewhere less than ideal. It’s just bound to happen.
Because of this, I recommend using tempera paints, which are washable and non-toxic. Plus they’re super vibrant and easy to thin down for pouring.
Usually I use Floetrol to thin my paints, but when I’m working with my kiddo, I avoid the chemicals and thin it down with some water.
How do you teach a child to paint?
You teach a child to paint by letting them just experiment and have fun with paint! Just like you should be doing when you’re acrylic pouring anyway!
Materials for getting started
This post contains affiliate links, which I earn a small comission from. These are provided for your convenience, and the price isn’t increased at all.
Canvas
When you’re starting out doing kids paintings with acrylic pouring, I would start out with smaller canvases. They’re easier to tilt and manipulate, especially for little hands.
You can find canvases at the dollar store, or Michael’s and Hobby Lobby will often have great sales on canvases as well as coupons. If you use a canvas, be sure to tighten the canvas up by spraying a small amount of water with a spray bottle on the front and back of the canvas.
If you and your children want to get adventurous, you can always move on to painting other things, like rocks, flower pots, or wooden cutouts!
Tempera Paint
My son picked out some neon tempera paint from Hobby Lobby (I’ve linked to the same brand and size pack, but online they don’t have the colors we bought), but tempera paint is really accessible and can be found at any craft store.
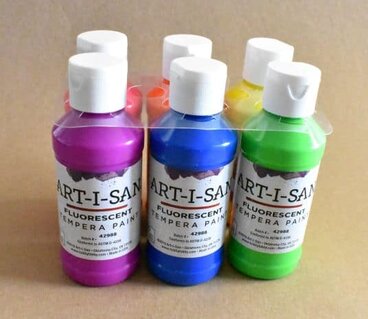
As far as colors go, the sky’s the limit really. You could do special holiday paintings, like for Christmas, Easter, Halloween, and use seasonal colors associated with them. Or you could tie them into your children’s room decor so that they look nice up in their bedrooms.
These kids paintings also make great DIY gifts for kids to make family members, so you could do them in colors that those family members would like.
Hey, and if you and the kiddos want to learn about color theory, I have a great post about Choosing Colors for Acrylic Pouring that goes over all of that. And feel free to grab your FREE Printable Color Wheel and 8 Color Wheel Guides below to use as a learning tool and a handy tool for acrylic pouring!
Water
Plain old tap water is just fine for this, nothing special needed!
Cups
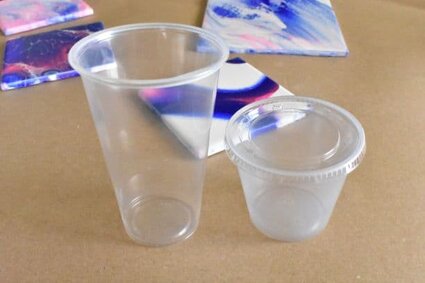
You need to have something to mix your paints in, and they’re handy for elevating your paintings so they don’t stick to whatever they’re drying on. Dixie cups are a great size for smaller paintings, but any plastic cups will do. I found these cool snack cups at the grocery store recently, and I really like them because they have lids, so if I mix too much paint, I can save it for later.
Popsicle sticks
You need to have something to mix your paint with your water, and popsicle sticks work well for that. Plus you can use them to apply paint as well.
Table Cover
Especially with kids, you’ll want to take care to protect your table and potentially your floor, especially if you’re working over carpet (which I don’t really recommend, but you gotta work with you got).
Some things that you can use are plastic tablecloths, trash bags, butch paper, or if you’re planning on doing a few paintings, you can repurpose a tupperware bin to pour in.
You also may want to do your kids paintings outside if there’s some good weather!
Drying Area
It takes a while for acrylic pour paintings to dry, so you’ll need a place for your painting to dry for at least a few days where your children won’t be tempted to touch them and ruin them.
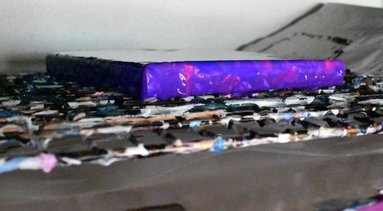
I like to use the tray-like boxes from Costco to dry my works. I just elevate the paintings on cups and put them in these boxes. Or another thing that I love to let my paintings dry on because they won’t stick is wax paper!
Paper towels/Baby wipes
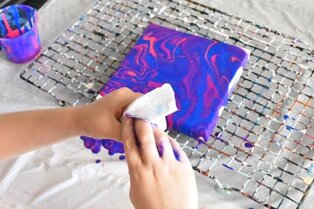
Just keep these on hand. You’re going to need them, and you don’t want to be running around the house looking for them when you do.
How do you start a canvas painting?
Tighten the Canvas
A lot of times your canvas will come out of the package a little loose or with divots in it. But don’t fret, there’s an easy way to get them out. All you need to do is get a spray bottle of water and spritz the back of your canvas. Be sure to get it right into each corner and to spray the front of the canvas on the corners as well.
Elevate Your Canvas
You’ll need some way to get your canvas up off of the table surface. Otherwise, you’ll just end up with your canvas sitting in a puddle of paint. Like I said above, you can set it on top of cups, no problem. You may also want to use a wire baking rack to put the canvas on top of so that the paint can drip down.
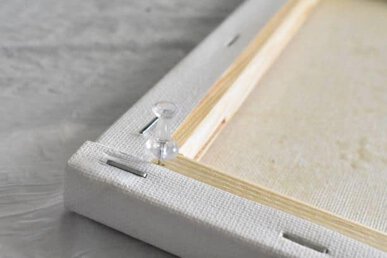
Another thing you can do is push thumbtacks into the wooden frame on the back of the canvas in each of the four corners. This option is great for kids because it gives them something to hold on to while they are tilting, but it can be tough to get the pins in (especially for those like me with bad hands).
Level Your Canvas
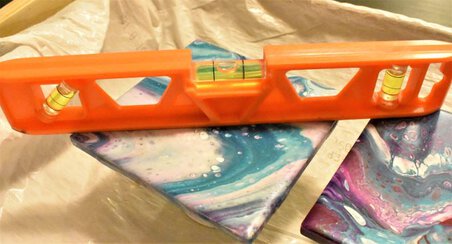
It’s really important for acrylic pouring that you have your canvas level so that when you leave it to dry, all of your paint doesn’t slide off of the canvas. As you can imagine, especially when you’e working with kids painting, that would be extremely disappointing.
One of these small levels is an inexpensive, easy tool to help with this.
Mixing Your Paints
For this project and having kids painting, like I said, I went non-toxic with just tempera paint and water. So that’s all you’ll need for this pouring “recipe.”
The ratio I used was about 2 parts paint to 1 part water. For this 4-inch-by-4-inch canvas, for each of the three colors, I used 2 tablespoons paint and 1 tablespoon water.
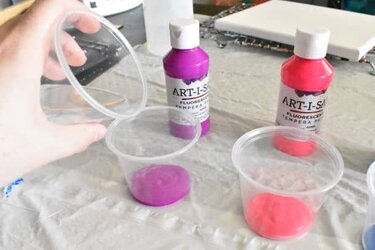
Now, I will tell you that this is NOT a hard and fast recipe because it really depends on the consistency of the paint that you start out with. So I recommend that you start out with your paint and gradually add water until you get it to a consistency that you’re happy with.
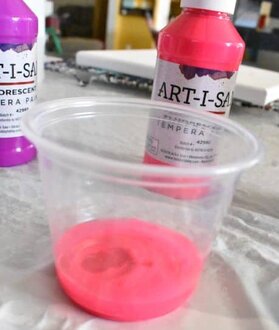
So what kind of consistency should you be shooting for with acrylic pouring? Well, I’ve heard it referred to as the consistency of warm honey, but I tend to think of it as pancake batter.
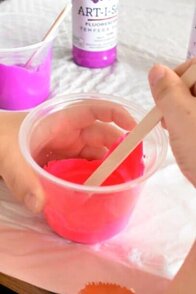
Be sure to mix your paint enough that you don’t have any chunks of the paint hanging out in there. You want it all to be incorporated.
The next question I usually see is how much paint should I use.
As I said before, for this project, my son painted a 4-inch-by-4-inch canvas, and for each of the three colors, I used 2 tablespoons paint and 1 tablespoon water. So that should help you get an idea of how much paint you will need.
But there are also a few pouring calculators out there that you can use to ballpark it:
- Smart Art Materials Acrylic Pouring Calculator
- Acrylgiessen Acrylic Pouring Calculator
- Leftbrained Artist: How Much Paint to Use
- Choelscher Art: How Much Paint
Ultimately, it is going to depend on the style of painting you’re going for, the thickness of the paint, so it may take some trial and error. When it doubt, mix up more than you think you’ll use and if you have extra, you can put a lid on it and save it for next time.
Get those Kids Painting!
Once everything is all set up and protected and you have all of your paints mixed, it’s time to get started on those kids paintings and let them have at it!
Techniques to Use for Kids Paintings
To start, I would recommend working with one of these five basic techniques, which are simple and great for beginners:
- Swipe
- Flip-cup Pour
- Dirty-cup Pour
- Puddle Pour
- Dip
For in-depth instructions on each of these and a video showing all of these, check out my Easy Paintings for Beginner’s Post.
And if you’re ready to move on to something more challenging, take a gander at my Comprehensive Guide to Acrylic Pouring Techniques. I’ve got over 30 different techniqes and videos compiled there!
If you’re looking for less abstract kids painting ideas, head on over to my natured-inspired section for a ton of different ideas, like beach scenes, the moon, outerspace, flowers, and so much more!
Video of Kids Painting
Step-by-step Kids Painting Project
For this project, my son decided on a dirty-cup pour. So away we went!
- As I said above, we used three colors that my son picked, so he poured the three colors into a fourth cup, layering as he wished.
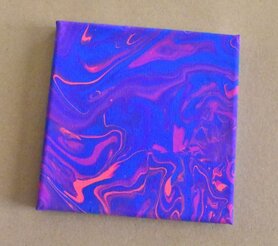
- Then he poured the fourth cup with the mixture of paint all over the canvas however he wanted.
- Next he tilted the painting to finish covering the canvas and move the paint around how he wanted.
- Last, he took a popsicle stick and scooped some of the excess paint back onto the sides of the canvas to finish it off. ( I did help with this step a bit.)
Go Forth and Paint!
That’s all there is to it! I hope that you and your child make some sweet memories and develop a love for pouring and art in general with these easy canvas paintings!
As always, check out my updates on Facebook and Instagram and feel free to peruse Homebody Hall for more fluid art tips, tricks, and tutorials! Also head over to Youtube and subscribe to get my videos sent to you as soon as they come out!!
And now you can joing my Facebook Group, Flourishing Fluid Arts with Homebody Hall and get help, tips, inspiration and just hang out and have a great time!
Want to remember this kids painting tutorial for later? Be sure to pin it to your favorite Pinterest board!
