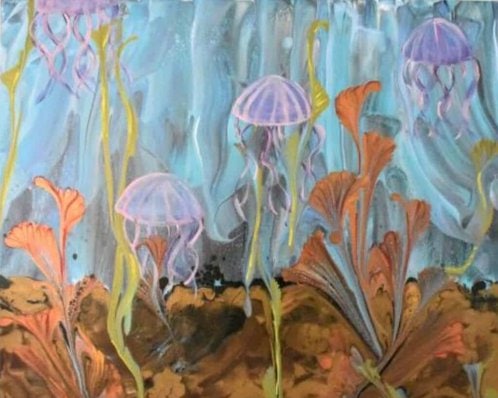
The ocean is so magical and mysterious! Seriously, we know hardly anything about it, and I think that that’s what makes it so beautiful. So in this tutorial, I’m going to show you how you can make an underwater painting for your home with acrylic pouring. I will go through each step in depth with photos as well as written instructions, and there is a video of the whole process near the bottom!
I personally think acrylic paint pouring is the perfect medium for an underwater painting due to its flowing and fluid nature. Plus, pour painting makes painting so easy that even someone who is just a beginner can make an AMAZING piece of art!
(If you’re all about the beach life and looking for other beach-theme painting ideas, you may want to check out my Beach Scene, Beach Sunset, Wave Pour, Large-scale Wave Pour, and Chain Pull Wave Pour paintings.)
If you’re pouring for the first time and would like more explanation on materials, processes, and terms, you can head on over to my Beginner’s Guide to Acrylic Pouring. You can also head over to my Comprehensive Guide to Acrylic Pouring Techniques for more information on all of the different techniques.
So how do you paint an underwater painting or a painting of under the sea? Well, the four techniques that I used were:
- Straight Pour
- Swipe
- Chain pull
- Hand-painting
What colors do you need to paint an underwater painting?
Well, one would obviously think of blue, but there’s a bit more to it than that. You’ll want to use a variety of tones of blue, ranging from light to dark as you get further down toward the ocean floor. There’s also an element of green to the water in most places, so you’ll want to be thinking about incorporating some turquoise .
Then, you’ve got to think about what you want the ocean floor to look like, or do you even want to incorporate that into your painting?
Additionally, you’ve got to think about what other things you will have in your underwater painting. Will you have coral or seaweed? Will you paint in some creatures like a mermaid, a sea turtle, fish, an octopus, a dolphin, seashells?
The acrylic pouring techniques that I’m going to show you in this tutorial are perfect for creating an amazing backdrop for any underwater scene that you want to create, so get creative and let your imagination wander!!
(If you’re curious about colors and color theory as it relates to acrylic pouring, head on over to my post about Choosing Colors for Acrylic Pouring and grab your FREE printable Color Wheel and Color Scheme Guides below!)
Materials You Will Need to Paint an Underwater Painting with Acrylic Pouring
Paints:
Water:
- Master’s Touch Permanent Black
- Artist’s Loft Titanium White
- Artist’s Loft Neon Blue
- Artist’s Loft Turquoise
- Master’s Touch Ultramarine
Ocean Floor:
- Artist’s Loft Raw Umber
- Artist’s Loft Metallic Bronze
Coral
- Artist’s Loft Copper
- Artist’s Loft Old Gold
Seaweed
- DecoArt Dazzling Metallics Festive Green
Jellyfish
- Artist’s Loft Titanium White
- Liquitex Basics Quinacridone Magenta
- Artist’s Loft Silver
- Master’s Touch Ultramarine
- Artist’s Loft Metallic Cobalt
- Artist’s Loft Deep Red
Highlights
- Artist’s Loft Deep Red
- Artist’s Loft Brilliant Yellow
Pouring Medium:
- Floetrol
- Water
Tools:
- Plastic folder cut in half
- Torch (optional)
- Palette Knife
- Fan Chain
- Mardis Gras Beads
- Paintbrushes
- Paper plate/ Palette
Canvas:
- 20in x 16in canvas
Step-by-step Underwater Painting with Acrylic Pouring
Painting the Ocean Floor
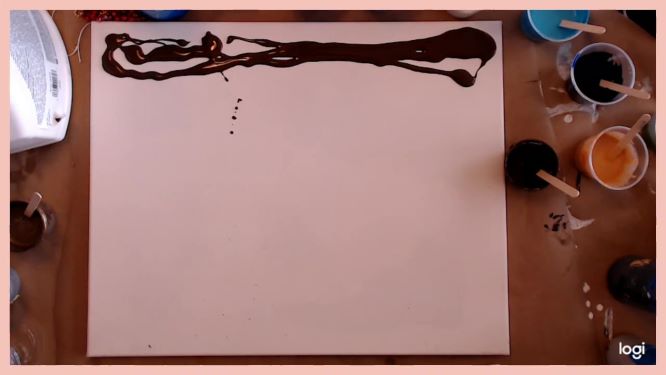


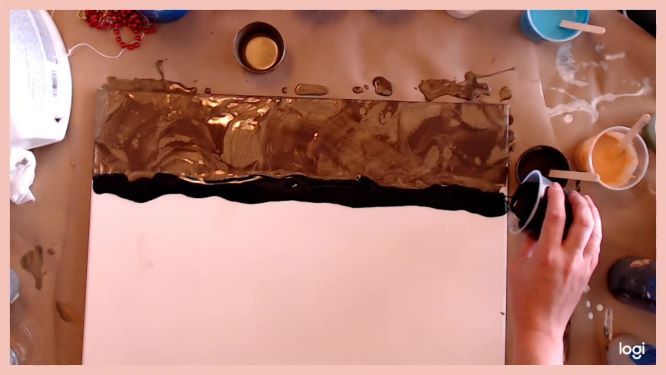
The first thing I started with for this underwater painting was the ocean floor. I used two colors: bronze and raw umber. I did a straight pour and just poured them onto the canvas in layers.
Next, I took a popsicle stick and did swipes in varying directions to mingle the two colors together. This also created some cells of each color in the other, which I think look somewhat like rocks on the ocean floor.
Laying Down the Colors for the Water


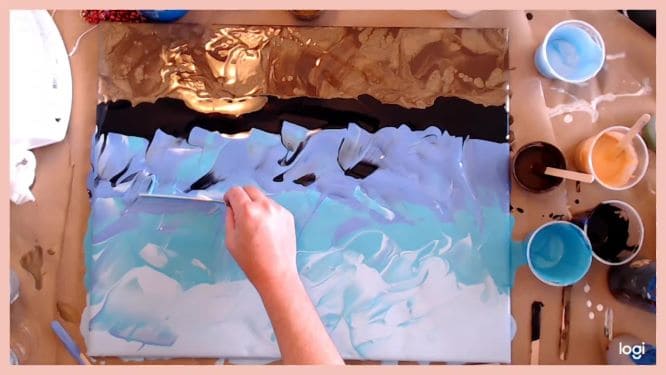
I used four different hues for the ocean: neon blue, turqoise, ultramarine blue, and a very deep, almost black navy blue.
Now, you’ll notice that the none of the colors in my painting look like the colors in the tubes. That’s because I mixed the neon blue, turquoise, and ultramarine blue with white for the top three layers of the water (closest to the surface of the water and top of the painting) and with ultramarine with black for the darkest layer.
I mixed my paints this way to get the muted blue tones that you see underwater and then to get the dark colors and shaddows that you see at the lower depths.
- The first layer that I poured onto the canvas after the ocean floor was the navy blue. This is the smallest of all the layers because it is such a powerful color and has the ability to take over the painting so incredibly quickly.
- The next three colors, the neon blue, turquoise, and ultramarine blue (all muted with white as noted above), were applied in equal portions and moving from dark to light up towards the surface of the water.
- Once all four colors for the water were applied, I again swiped with a popsicle stick to roughly mix some of each color into all of the others so that, rather than stripes, it was a transitional gradient.
Swipe Water Colors Together


Next, you’ll want to create a seamless gradient for my underwaterpainting, moving from dark along the ocean floor to lighter near the surface.
(I find that it is easier to swipe downward, which is why the painting has been upside down this whole time.)
- Take one half of a plastic folder was cut in half and swipe from dark up to light, dragging a thin layer of the dark navy blue up through the painting, making your way across the painting until it has all been swiped upward. Don’t freak out if it seems really dark! There’s more to go!
- Now, to get rid of that dark line on top of the ocean floor, use a popsicle stick to swipe the navy blue paint down into the ocean floor. Add some more bronze if necessary.
- Do not wipe the paint off of the folder in between swipes and swipe a couple more times or until you’re happy with the way it looks in terms of dark to light.
- If you fancy a torch, go ahead and torch the water to try and encourage some lacing and bubble-like cells.
Add Some Light from the Surface
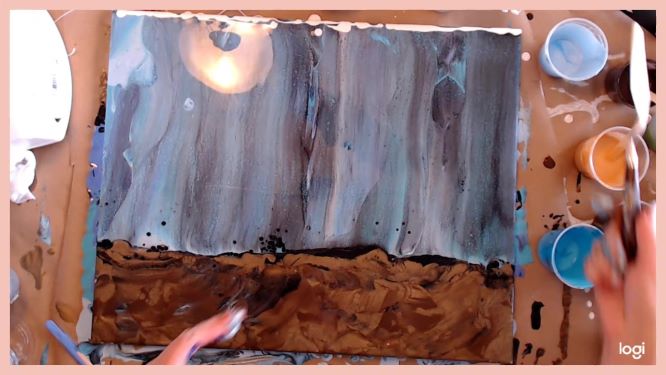


- Pour a very thin line of white paint at the top of your underwater painting.
- Using a palette knife, swipe that white paint downward, curving your strokes towards the sides on the edges. These swipes will not only bring white down into your water for surface light but will also expose some more of the blue you may have lost during our last swipes.
- Again, if you fancy a torch, go ahead and torch the water to try and encourage some lacing and bubble-like cells.
Bring in Some Color with Coral
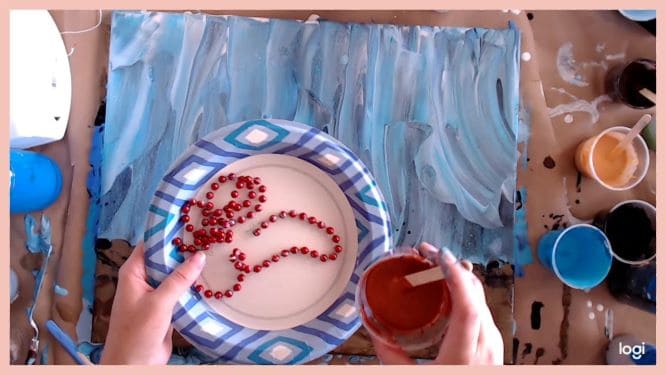


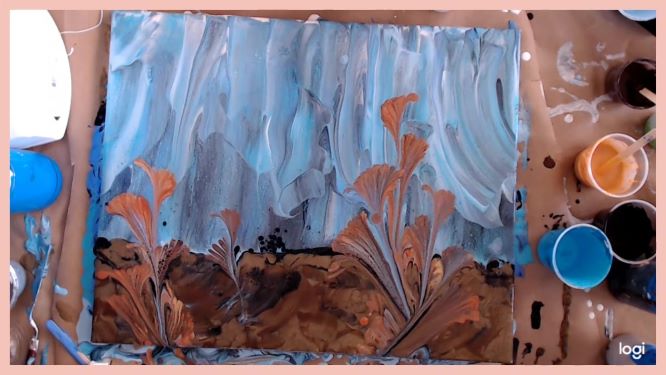
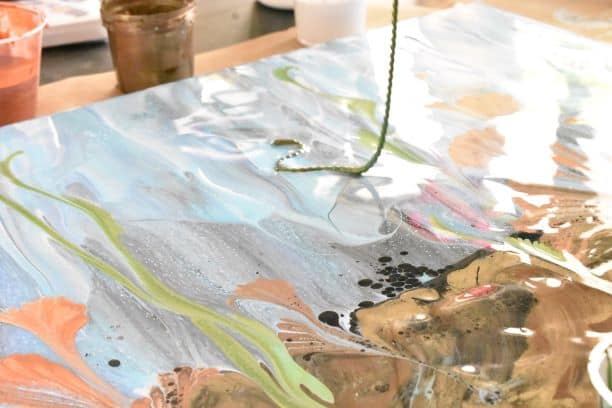
Now that the background is done, you can use your imagination or even a photo reference to add in any details that you want. The first thing I added was some coral in some metallic hues with chain pulls using mardis gras beads.
- Pour the paints for your corals (could be any colors you wish!) onto a paper plate.
- Roll your beads around in the paint.
- Place your beads on your painting in a serpentine pattern and then pull straight down.
- Repeat as many times as you wish to create your perfect underwater painting! I suggest mixing up the sizes and locations to create a dynamic composition.
I did clean the beads after my pulls and just kept dipping into the same paper plate. This diluted the colors a bit, but I liked that effect. If you want brighter, more defined chain pulls, you can clean your chains after each pull.
If you want even more control, rather than just rolling your beads in the paint, you can also apply the paint directly to the beads in a more precise way.
Add in Your Seaweed
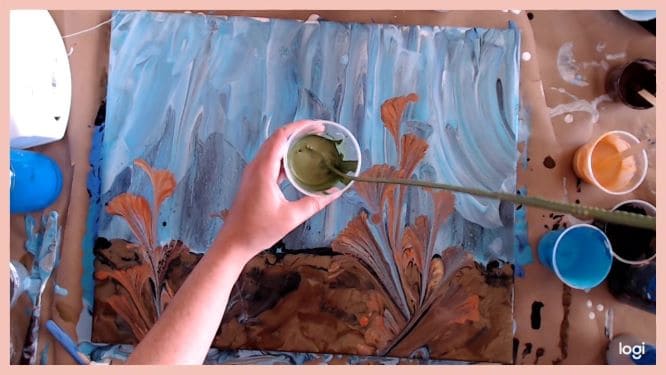


The next thing I chose to add was some seaweed flowing in the water, and I think the chain pull creates amazing floral details and a flowy appearance. For the seaweed, I opted for using a fan chain to make the seaweed stalks a little more dainty than my coral.
- Dip your chain into a cup of your seaweed paint.
- Place your chain on your painting in a serpentine pattern (not as wide as your coral) and then pull straight down.
- Again, repeat as many times as you wish to create your perfect underwater painting! As with the coral, I also suggest mixing up the sizes and locations to create a dynamic composition.
Highlight the Beauty of Your Pour
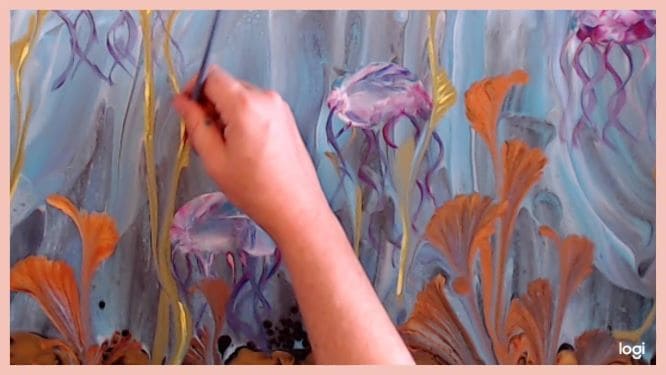
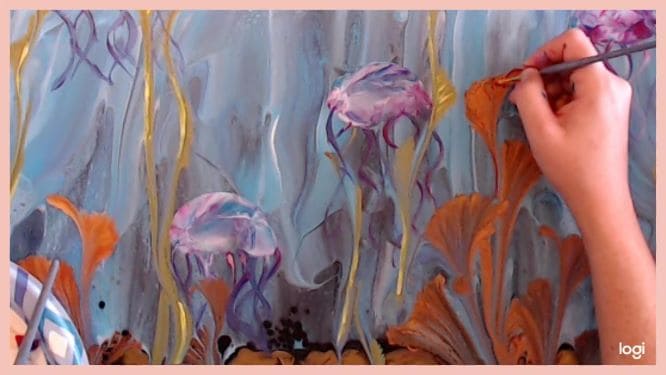
Once my underwater painting background was dry, I used some primary colors, yellow and red, to highlight some of the details in my seaweed and coral. It’s so simple, but it adds a lot of depth and detail to the painting. All you have to do is find some lines and details that you like and go in with a fine brush and a poppy color to trace them and bring them out.
Add some Jellyfish if You’d Like!
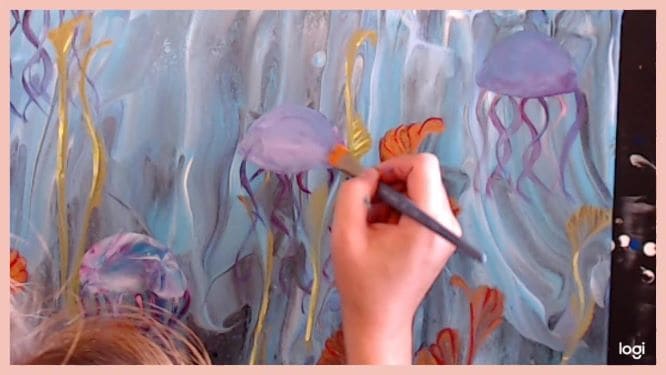
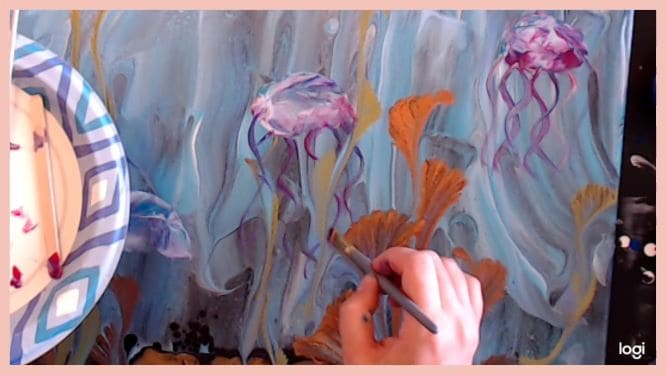


So if you watch the video, you’ll see that it took me a few different iterations of these jellyfish to get them to where I liked them. You know, it was an a learning experience, and I think it’s important to try your ideas and see where they lead!
I tried a balloon smash for the tops of the jellyfish, but I didn’t end up liking the way that looked, so I smoothed out the paint with a flat brush. I also tried using a chain pull and string pull for the tentacles, but resorted to a brush as well to get the flowy movement I wanted.
Also, the colors that I chose to begin with were too dark and blended into the background too much, but they worked well as underpainting. So I landed on a very light pink that I got from mixing the deep red and titanium white, it ended up really lending toward the delicate and transluscent look of the jellyfish.
- With a flat brush ( I used about a 1/2-inch brush), paint a the mushroom-like shape of the top of the jelly fish in a medium hue. Something just slightly darker than what you used for one of the three lighter water shades would work well. I used the light ultramarine blue mixed with some purple made from ultramarine blue and magenta.
- Using a smaller fine-tip brush, paint in the wavy tentacles in your underpainting color.
- Now take your lighter color, like the pink I used, and paint in the details of the top, the lines radiating down from the center.
- Also go through and do a second go through of the tentacles with your lighter color.
Go Forth and Pour!
And there you have it, your very own underwater painting! I hope you enjoyed this tutorial and share your results!
As always, check out my updates on Facebook and Instagram and feel free to peruse Homebody Hall for more fluid art tips, tricks, and tutorials! Also head over to Youtube and subscribe to get my videos sent to you as soon as they come out!!
2024 Color Palettes for Creating Updated Art
Let’s Throw a Paint Party: How to Host Your Own Paint and Sip
Do It Yourself Countertop Paint: Update Your Kitchen With Pour Paint
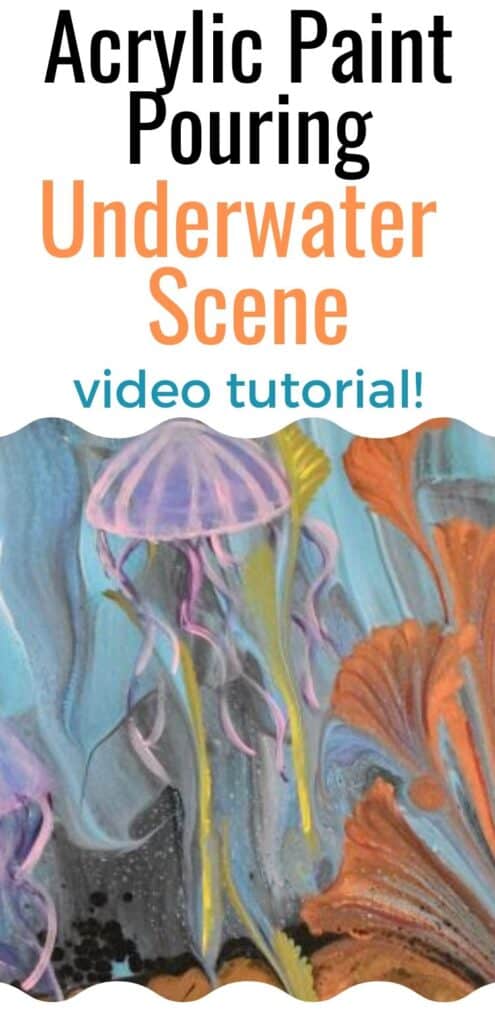
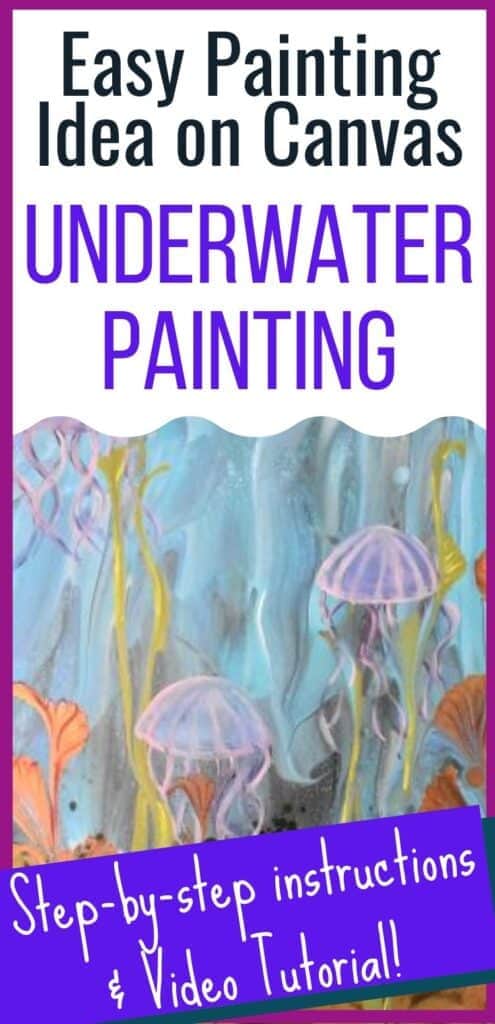
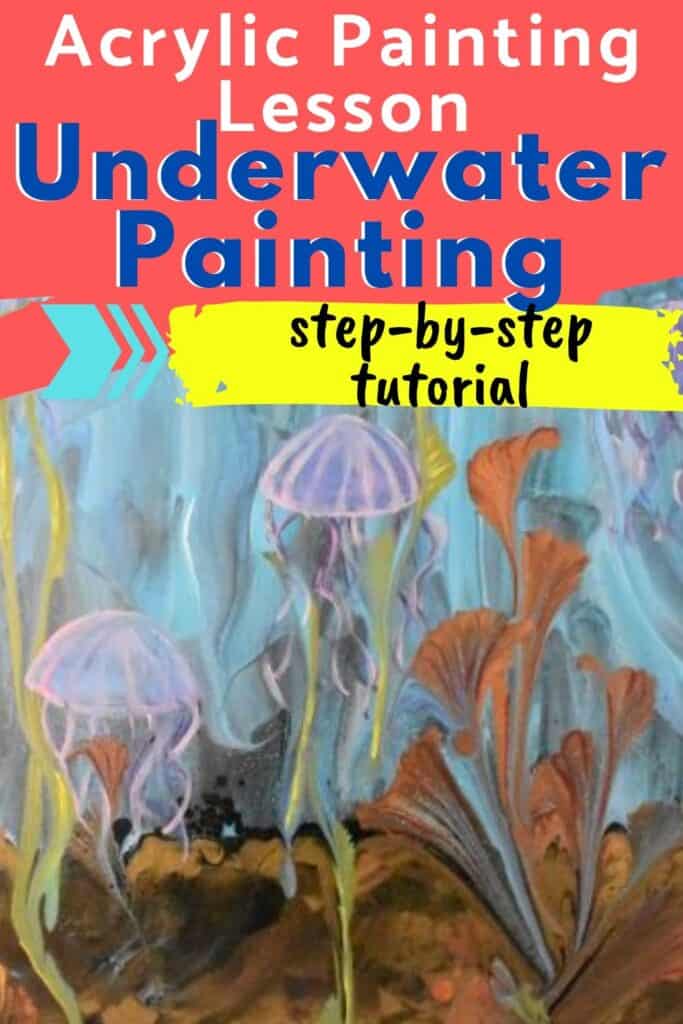
Want to remember this beach scene acrylic pour painting? Pin this tutorial to your favorite Pinterest Board!
Beautiful! So want to attempt!
Do it! You’ve got this!