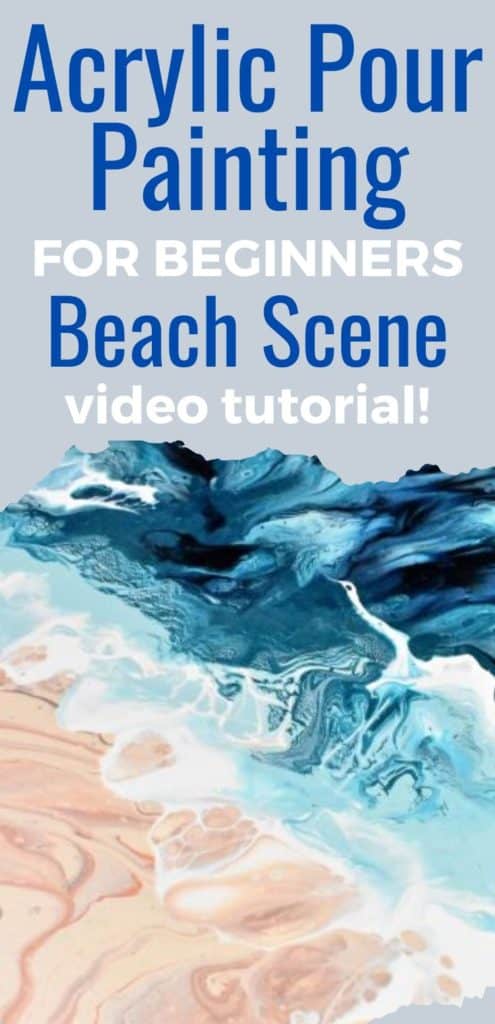
This week, I continued my acrylic paint pouring beach-themed paintings with this tutorial on how to paint a beach with acrylic pouring. This is my simple take on the shore, and it’s easy enough that anyone can create a beautiful ocean scene for their home too!
If you haven’t been following along, I thought it would be interesting to make a series of paintings showcasing different aspects of the beach using the same colors in different proportions and placements. If you’re all about the beach life and looking for other beach-theme painting ideas, check out the rest of the series: Beach Sunset, Wave Pour, Large-scale Wave Pour, and Chain Pull Wave Pour.
This beach scene is a little bit more of what’s being done out there in acrylic pouring with the sand and the ocean, but it’s my own take on how to paint the beach with a reverse dip, which I think is just great for capturing the movement of the waves.
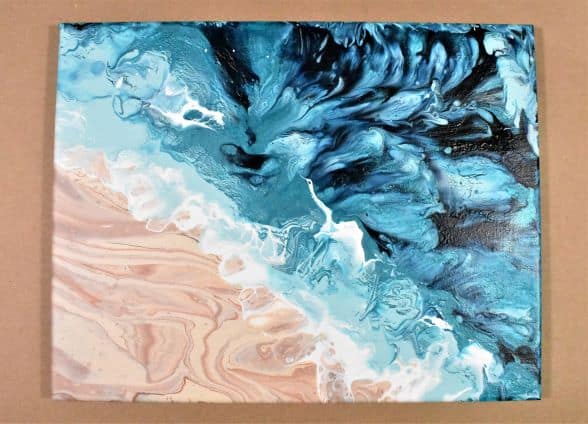
There was some cracking in this acrylic paint pour painting, which I think is due to the thickness of the latex paint I used, but ultimately I think it only added to the effect, and I’m not mad about it at all.
If you’re pouring for the first time and would like more explanation on materials, processes, and terms, you can head on over to my Beginner’s Guide to Acrylic Pouring. You can also head over to my Comprehensive Guide to Acrylic Pouring Techniques for more information on all of the different techniques.
Supplies and Materials Needed for Easy Acrylic Paint Pouring Beach Scene for Beginners
This post contains affiliate links, which I earn a small comission from. These are provided for your convenience, and the price isn’t increased at all.
- Open-cup Pour
- Reverse Dip with cling wrap
- Straw blown
Paints:
- Navy Blue mixed from Artist’s Loft Bright Blue and Master’s Touch Permanent Black
- Artist’s Loft Metallic Cobalt
- Artist’s Loft Titanium White
- Flat, Medium Base Behr Paint & Primer in One, Color Sample – Mauve color*
- Flat, Deep Base Behr Paint & Primer in One, Color Sample – Salmon color*
- Ultra Pure White Base Behr Interior Matte /Exterior Flat Stain-blocking Paint & Primer Marquee Color Sample – Teal color*
- Dunn Edwards Perfect Palette Sampler, Interior Velvet Light Base – Cream color*
*I don’t know the exact colors of these because I purchased them in the “oops” section of Home Depot as well as from the HabiStore, but I noted as much identifying info as I have. I also have listed some similar acrylic paint colors below these.
Pouring Medium:
- Floetrol
- Water (only in acrylics)
When I prepare my acrylic paint for pouring, I use a ratio of 1 paint to 2 Floetrol and add a couple drops of water. The consistency I shoot for is a little thinner than pancake batter.
For latex paint, the consistency is a little bit thicker than pancake batter, and I don’t use any water.
These are just my preferences, and you can and will eventually come up with your own “recipe” so to speak that you like for your paints that get the effects you’re looking for. There is a lot of variation in paint brands that will come in to play when you’re mixing your paint as well.
Canvas:
Step-by-step Painting a Beach Scene for Beginners
Painting the Sand
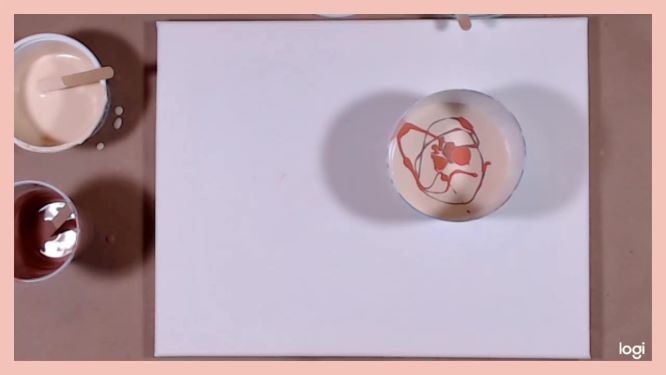

The first thing I started painting was painting the sand. I just did a corner of the canvas, but if you’re looking for a sandy beach, you can adjust the proportions of the water and the sand. You could also leave room for a palm tree if you’re into tropical beaches.
The sand is an open-cup pour of three different colors. I think that this added a nice dimension to the sand. You could use more or less colors depending on the effect you’re going for, but having a light, medium and dark is usually a good way to go. You’ll see that I did the same for painting the ocean as well.
Painting the Ocean
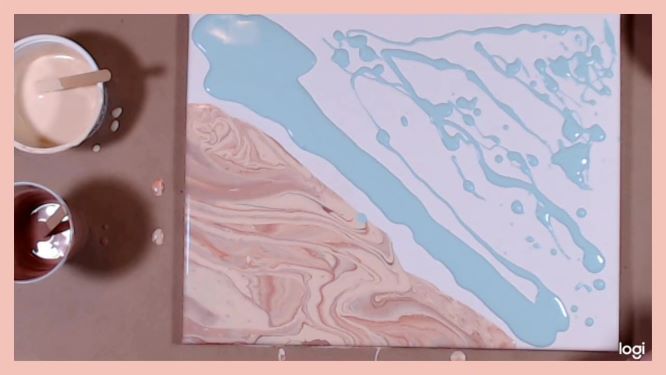


Again, with the ocean, I used three different colors, a light, medium and dark. When thinking about how to paint the ocean, I thought about how the colors would actually go from light to dark as the ocean gets deeper.
But it wouldn’t be uniform, it would be gradual. So I layered the colors as you see in the photos above, with the light tapering off toward the corner and there being more dark paint toward that corner.
To create the movement of the ocean, I used the reverse dip technique with plastic wrap and pulled the plastic away toward the ocean corner.
Painting the Waves
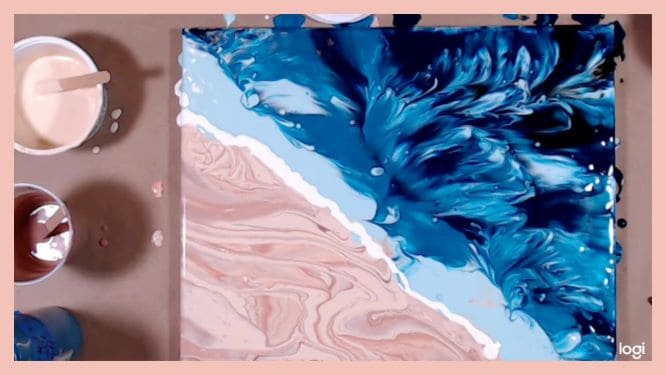


I think any acrylic paint ocean tutorial would be remiss if it didn’t include some details. So for this painting of water with acrylics, I made sure to add the sea foam and some of the whitecaps.
First, I added a thin line of white paint where the sand meets the ocean. Then I added a couple of areas of white a little further into the ocean for the whitecaps. Last, I used a straw on these areas of white to get some lacing and blend them into the water.
Go Forth and Pour!
I’m really excited about this series, both because of the subject, the beach, and because I think it’s interesting to see what all you can do with a handful of colors and how you can create such different paintings by changing the amounts, placement, and techniques used.
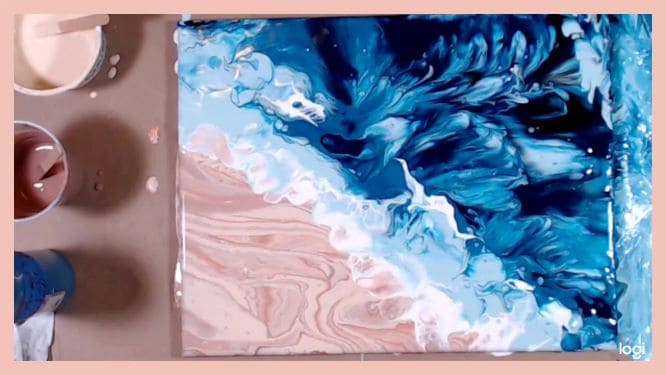
I hope you have a great time creating your own DIY beach painting and check out my other easy beach paintings for beginners as well! (Beach Sunset, Wave Pour, Large-scale Wave Pour, and Chain Pull Wave Pour)
As always, check out my updates on Facebook and Instagram and feel free to peruse Homebody Hall for more fluid art tips, tricks, and tutorials! Also head over to Youtube and subscribe to get my videos sent to you as soon as they come out!!
2024 Color Palettes for Creating Updated Art
Let’s Throw a Paint Party: How to Host Your Own Paint and Sip
Do It Yourself Countertop Paint: Update Your Kitchen With Pour Paint
Want to remember this beach scene acrylic pour painting? Pin this tutorial to your favorite Pinterest Board!
