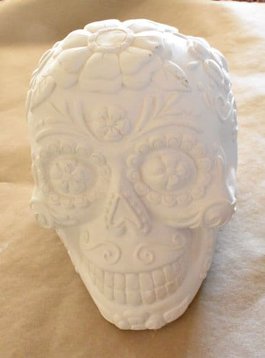
Last fall I came across this plaster sugar skull at Michael’s. I was in love and immediately began imaging all of the sugar skull art possibilities. Being from the Southwest part of the United States, I have always been fond of Mexican culture and art. So I snapped it up. But as it does, life got busy, and my project got put on hold. Until now!
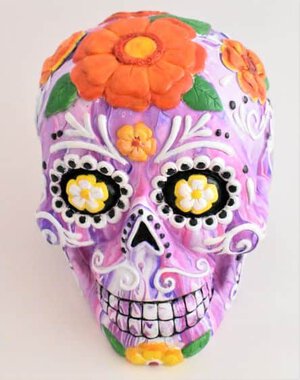
This week I was finally able to find the time to work on this, and it has to be one of my most favorite pieces I’ve ever done! So I’m very excited to walk you through step by step how to make some beautiful sugar skull art of your very own. It really wasn’t very hard, maybe just on the tedious side. But there are ways that you could make it easier and even adapt it for a kids project.
If you’re pouring for the first time and would like more explanation on materials, processes, and terms, you can head on over to my Beginner’s Guide to Acrylic Pouring. You can also head over to my Comprehensive Guide to Acrylic Pouring Techniques for more information on all of the different techniques and my How to Thin Acrylic Paint for Acrylic Pouring post to learn all about pouring mediums!
So how do you paint sugar skull art with acrylic pouring? Well, the two techniques that I used were:
- Dirty-cup Pour
- Hand-painting
What colors do you need to paint sugar skull art?
You can use any color that you want for sugar skull art because sugar skulls traditionally are very colorful. And in fact they often reflect the personality and taste of people who have passed in our lives. They can also be given to people around Dia De Los Muertos (Day of the Dead) who are special to you who have yet to pass and be decorated to suit them.
I chose to use traditional Dia De Los Muertos colors for my sugar skull art. I did some research and reading about what the colors are and what they meant and found the information below at Old Town San Diego’s Dia De Los Muertos and Flavors of the Sun.
- Pink: “celebration, joy”
- Purple: “pain, suffering, grief, and mourning”
- Yellow and Orange: “the brilliance of the sun and a new day, Cempazuchitl are marigolds that symbolize death. Petals are used to make a trail so that the spirits can see the path to their altars.”
- White: “purity, promise, and hope”
- Red: “the blood of life which sustains not only the body but the soul and a symbol of sacrifice”
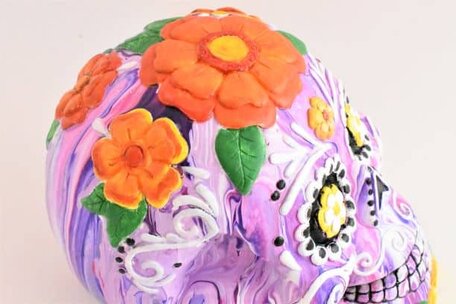
I chose to keep this sugar skull feminine by doing the pink and purple in the background, and then I painted the flowers to mimic the traditional marigolds. I kept the color palette for the embellishments limited because the background is so busy from the pour.
(If you’re curious about colors and color theory as it relates to acrylic pouring, head on over to my post about Choosing Colors for Acrylic Pouring and grab your FREE printable Color Wheel and Color Scheme Guides!)
Materials You Will Need to Paint a Plaster Sugar Skull with Acrylic Pouring
This post contains affiliate links, which I earn a small comission from. These are provided for your convenience, and the price isn’t increased at all.
Paints:
- Artist’s Loft Deep Yellow
- Master’s Touch Yellow Med (Buy at Hobby Lobby / Amazon)
- Master’s Touch Crimson (Buy at Hobby Lobby / Amazon)
- Master’s Touch Titanium White
- Artist’s Loft Brilliant Blue (mixed with yellow to make green for the leaves)
- Liquitex Basics Quinacridone Magenta (mixed with white to make the pink I used)
- Master’s Touch Permanent Black
- Master’s Touch Ultramarine (this was mixed with the magenta to make the violet I used) (Buy on Hobby Lobby / Amazon)
Pouring Medium:
- Floetrol
- Water
Tools:
Canvas:
- Plaster Sugar Skull (Since this is a seasonal item, Michael’s doesn’t currently have theirs listed, hopefully you’ll be able to find them this fall. But here are some other options that I found.)
Sugar Skull Art Video Tutorial
Step-by-step Sugar Skull Art with Acrylic Pouring
Acrylic Pouring for the Whole of the Sugar Skull
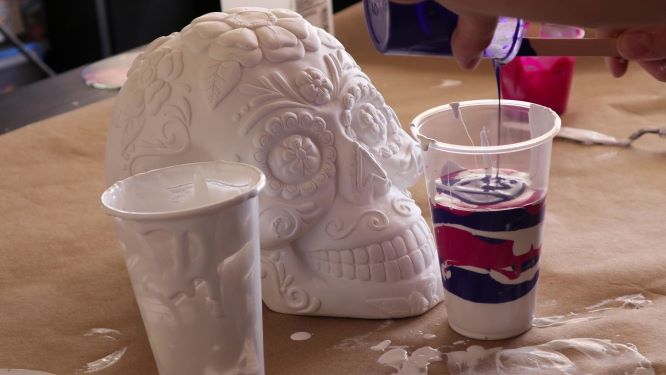
- Fill your dirty cup with the colors that you want your sugar skull base to be.
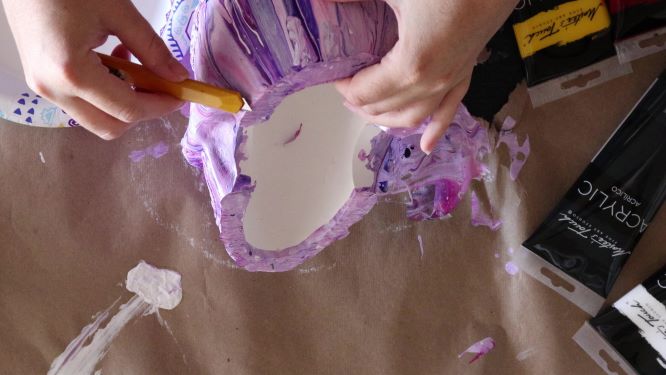
- Pour this dirty cup over the skull. I think it’s god to start with the back, where there’s no embelishments or other dips and creases. If your sugar skull has embossed designs, you might want to try to avoid pouring paint on these. But really it’s virtually impossible and it’s tough to get full coverage of the background, so just focus on coverage.
- Use a popsicle stick and scoop the excess paint onto any parts where paint hasn’t hit to ensure full coverage.


Hand-paint the Details of your Sugar Skull Art
- I dried my sugar skull art on parchment paper, so there was a little bit of excess paint that I had to trim off of the edges with an exacto knife.
- Titanium white is an opaque paint, so it’s great for covering other colors. Use white to paint the embossed decorations or to sketch out the decorations you want on your skull if it doesn’t have the decorations already on there.
- Paint your sugar skull however you want! Have fun, get creative and go for it!
If you want to make this part easier, the embossed skulls are the way to go. If you want a little more freedom, go for the plain ones. The other thing you could do if you’re not big on hand-painting is grab some paint pens and fill in the details that way! This would also be a simple way to do it with kids.


Go Forth and Pour!
So that’s how I used acrylic pouring to create sugar skull art! I’m really hoping that Michael’s will bring back these particular skulls because they’re so great. Plus, they had dog and cat ones, and I really want to make some more of these for gifts. Keep your eyes out for them and let me know if you see them before I do!
Hey, if you’re reading this, odds are, it’s getting close to the end of the year and the holidays. If you’re looking for gift ideas for your artist friends or to give to your family for yourself, you’ll love my 43 Genius Gift Ideas for Artistst into Acrylic Pouring!
As always, check out my updates on Facebook and Instagram and feel free to peruse Homebody Hall for more fluid art tips, tricks, and tutorials! Also head over to Youtube and subscribe to get my videos sent to you as soon as they come out!!
