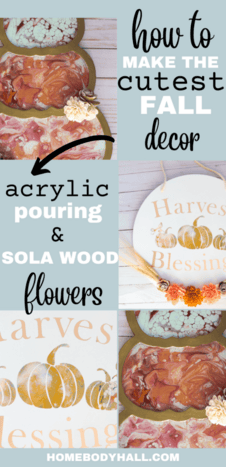
Fall is such a fun time to decorate, and I have the perfect projects to share with you that incorporate a few different mediums, including Sola Wood Flowers!
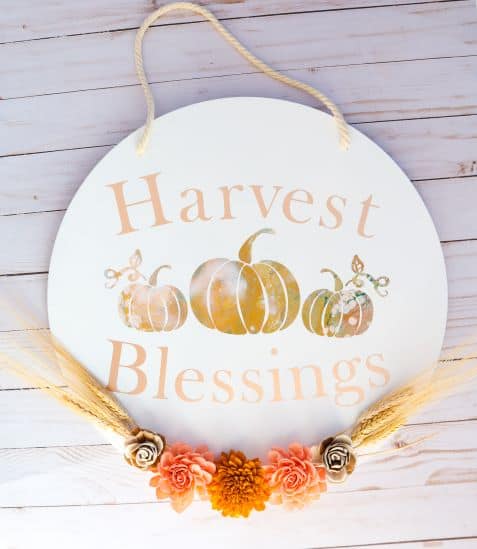

Full disclosure, Sola Wood Flowers reached out to me and allowed me to choose some of their products in exchange for me making a project and sharing it. Also full disclosure, I had so much fun shopping on their site and working with their amazing products that I would totally recommend their products to anyone. The only thing that I found frustrating was that many of their products appear to be unavailable and sold out often. In fact, since I first wrote this post, they have stopped carrying their wood cutouts unfortunately.
For these projects, the mediums I used were:
- Acrylic Pouring
- Acrylic Paint
- Sola Wood Flowers
- Spray Paint
- Cricut White Removeable Vinyl
- Cricut Rose Gold Adhesive Foil
The two acrylic pouring techniques I used for these projects were:
- Open-cup Pour
- Flip-cup Pour
If you’re pouring for the first time and would like more explanation on materials, processes, and terms, you can head on over to my Beginner’s Guide to Acrylic Pouring. You can also head over to my Comprehensive Guide to Acrylic Pouring Techniques for more information on all of the different techniques and my How to Thin Acrylic Paint for Acrylic Pouring post to learn all about pouring mediums!
What colors work for fall paintings?
Decor choices are so personal, and I feel like you can work seasonal decorations into any color scheme you’ve got going on. But I love earthy tones for fall, the traditional leaves changing colors, and metallics. This year, I also mixed in some super light mint green and navy blue for contrast in these pieces.
(If you’re curious about colors and color theory as it relates to acrylic pouring, head on over to my post about Choosing Colors for Acrylic Pouring and grab your FREE printable Color Wheel and Color Scheme Guides!)
Materials You Will Need for these Acrylic Pouring + Sola Wood Flower Projects
This post contains affiliate links, which I earn a small comission from. These are provided for your convenience, and the price isn’t increased at all.
Paints:
- Master’s Touch Yellow Med
- Master’s Loft Permanent Black
- Liquitex Basics Titanium White
- Artist’s Loft Bronze
- Master’s Touch Crimson
- Golden White Gesso
All of the colors that I used were mixed from the colors above.
Pouring Medium:
- Floetrol
- Water
Canvas:
- Three-stacked Pumpkins Wood Cutout
- 16-inch Circle Wood Cutout
Sola Wood Flowers:
Resin Supplies:
Cricut Supplies:
Other Supplies:
Acrylic Pouring Harvest Blessing Sign Embellished with Sola Wood Flowers Video Tutorial
Acrylic Pouring Stacked Pumpkin Fall Decor Embellished with Sola Wood Flowers Video Tutorial
Step-by-step Acrylic Pouring Harvest Blessing Sign Embellished with Sola Wood Flowers
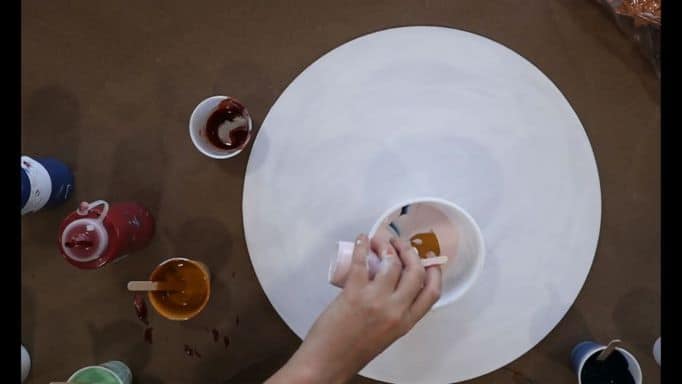


- Tape off the back of the 16-inch wood round with painter’s tape.
- Gesso the wood round.
- Prepare your pour cup. Place the wood round face-down on your cup and flip them both over in tandem. Lift the cup.
- Tilt the round so that the paint covers the entire round.
- Allow your round to dry for at least a couple weeks.
- Design/find a design that you like for your sign. Here’s where I got the pumpkin design.
- With your Cricut or even scissors, cut out your design in removable vinyl.
- Using transfer tape (or not if your design is larger and not too many pieces), transfer your vinyl desin onto your wood round.
- Spray paint over the entire round.
- Remove the painter’s tape from the back of the sign.
- Remove the vinyl design to reveal your pour in the design.
- Add any other design elements you’d like, such as the “Harvest Blessings” in the rose gold adhesive foil.
- Hot glue the sola wood flowers and wheat onto the sign.
- Drill two holes in the top of the sign, making sure they’re evenly spaced from the edge of the sign as well as the middle of the sign.
- Place the each end of your rope (I cut mine about 8 inches long, but this is totally up to you.) in the hole and tie a knot agains the back of the sign. I used blue painter’s tape wrapped around the rope to make it easy to thread through the holes.
Step-by-step Acrylic Pouring Stacked Pumpkin Fall Decor Embellished with Sola Wood Flowers
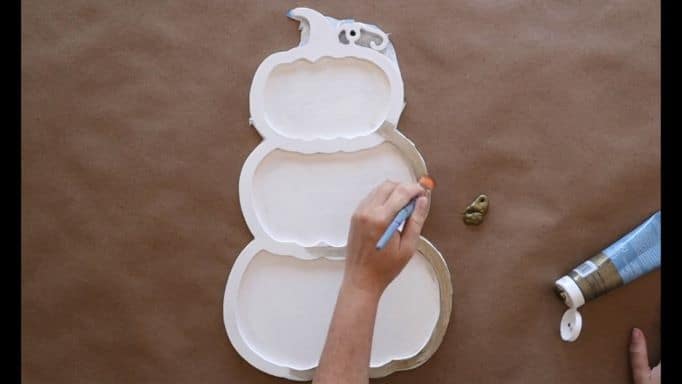


- Tape off the back of the 3-stacked pumpkins with painter’s tape.
- Gesso the wood round.
- Paint the edge of your pumpkins with bronze paint (or whatever you’d like really).
- Prepare your pour cup. Pour your paint into each of the pumpkins, tilting as you go to completely cover the pumpkins. Another option is to let each pumpkin dry before going on to the next so that the paint of the previous pumpkins are not moving around.
- Allow your pumpkins to dry for at least a couple weeks.
- Prepare your resin according to the instructions for your particular resin.
- Pour the resin into each pumpkin. I like to use a silicone makeup brush to make sure that the resin gets into all the smaller areas.
- Use a heat gun to pop any bubbles in the resin.
- Clean up any accidental drips on the border with some rubbing alcohol and a cue tip.
- Allow your resin to cure for the amount of time recommended in the instructions for your resin.
- Remove the painter’s tape from the back of the sign.
- Touch up any places you need to on the border with acrylic paint.
- Hot glue the sola wood flowers onto the pumpkin.
Go Forth and Pour!
All right, hopefully now you’ve got some new inspiration for using acrylic pouring in new and fun ways and some ideas about incorporating multiple media types like the Cricut and Sola wood flowers into your designs.
If you liked this, you may be interested in even more seasonal projects, like these:


And, hey, the holidays are coming up! If you’re family keeps asking you what you want, point them to this gift guide of 43 Genius Gift Ideas for Artists into Acrylic Pouring!
As always, check out my updates on Facebook and Instagram and feel free to peruse Homebody Hall for more fluid art tips, tricks, and tutorials! Also head over to Youtube and subscribe to get my videos sent to you as soon as they come out!!
And now you can joing my Facebook Group, Flourishing Fluid Arts with Homebody Hall and get help, tips, inspiration and just hang out and have a great time!
Let’s Throw a Paint Party: How to Host Your Own Paint and Sip
Acrylic Christmas Painting Ideas for Creating Easy Holiday Decor
Art Projects for November: Fantastic Fall Paint Pouring Ideas
Want to remember this sola wood flower + acrylic pouring mashup for later? Pin this tutorial to your favorite Pinterest Board!
Thank you Nerissa! They where very nice projects, congratulations