Spice up your space with some marbeled resin coasters! Coasters are one of those necessities for keeping your furniture in good shape, but they don’t have to be boring. In fact, they’re a really fun way to bring in a pop of color or inject something different and unexpected into your space without being overwhelming.
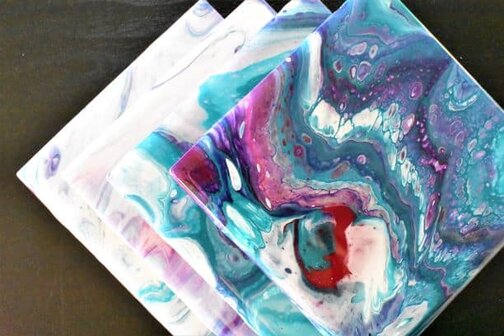
I started making marbled resin coasters with acrylic pouring last winter. I made a set for each family member for Christmas, and they were super well received. So I thought I would let you in on the fun and share a video of how I make them!
Supplies and Materials Needed:
Paints:
- Artist’s Loft Metallic Cobalt
- Liquitex Quinacridone Magenta
- Master’s Touch Titanium White
- Artist’s Loft Silver
Pouring Medium:
- Floetrol
- Water
Canvas:
- Ceramic tiles sourced at my local HabiStore
Method:
- Dirty cup pour
- Ribbon pour
Sealant:
- Pro Marine Epoxy Resin
- Mixing cups
- Popsicle sticks
- Heat Gun
Safety Gear:
- Gloves
- Respirator
- Plastic Sheeting
Marbling your Resin Coasters
You can really use an method or acrylic pouring or otherwise to paint your coasters. Watch the video below for my favorite method!
After the pouring process, there’s a few things that need to be done to your coasters to make them last and to make them work well for you.
Let your Marbled Coasters Cure
In an ideal world, your coasters should be left to cure for at least 3 weeks, to let the paint cure completely. I usually let mine cure for about a month. So if you’re thinking about making coasters for gifts, they are something that you’ll want to think about ahead of time.
I’ve seen some people say online that they resin as soon as their coasters are dry to the touch. And if this works for you, great, but the research that I’ve done shows that any moisture can affect the resin and they way that turns out. So I err on the side of caution and let my acrylic pours cure for about a month because I don’t want to ruin a pour that I’m in love with.
Prepare your Marbled Coasters
Clean your Marbled Coasters
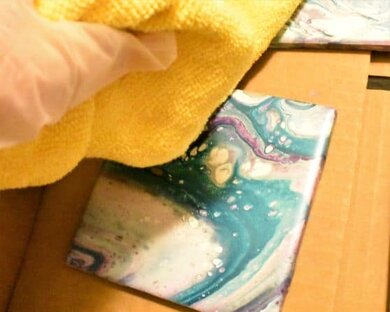
I’ve learned through experience that it’s very important to clean acrylic pours that are going to be resined. When I clean my acrylic pours that I’m going to resin, I wear gloves and use a microfiber cloth. The gloves ensure that the oils from your hands don’t get left on the pour and affect the adhesion of the resin. Microfiber is awesome because it doesn’t leave lint that will get into the resin.
Elevate your Coasters
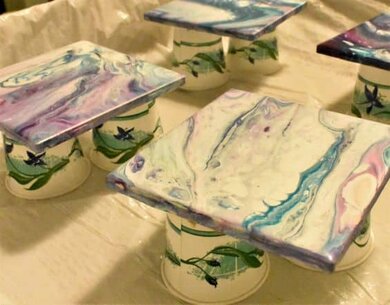
I like to resin small projects like coasters in cardboard boxes that I have cut down into trays. Then I cover the trays with trash bags. Resin will not stick to the plastic, so it makes for easy cleanup. I set the coasters up on Dixie cups to elevate the coasters so that the resin can drip off during the self-leveling process.
Level your Coasters
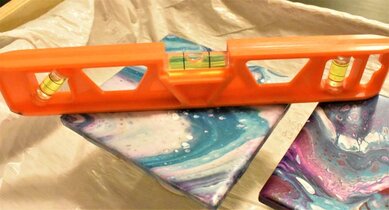
It’s important to make sure that your coasters are level so that the entire coaster gets covered evenly. Resin is super cool because it self-leveling. But in order for that work out well, the surface you’re applying resin to needs to be level. So I use a small bubble level and make sure it’s level in all directions.
Applying Resin to your Marbled Coasters
I use Pro Marine Epoxy Resin. I’ve used this resin on quite a few projects, and I highly recommend it. With whichever resin you choose, you should follow that brand’s specific instructions for mixing and use, for the best possible results.
Always be sure to use a respirator and gloves and work in a well-ventilated space for safety, and be sure to cover anything that you don’t want to get ruined by resin with plastic.
For coasters specifically, because I want them to be able to be used with hot beverages, it’s necessary to get the hardest finish. To do that, I allow the resin to heat itself a little by allowing it to continue its reaction a bit before I apply it. I also allow the resin to set and cure in a warm room. These techniques are based on the instructions from the manufacturer about how to enhance the hardness of the resin.
I use a heat gun to pop bubbles a couple times during the first couple hours, and you’ll also want to be sure to check to make sure that there are no spots where the resin has resisted and fill them in if there are any.
Find a Good Area for Applying Resin
I’m going to let you in on my setup for applying resin right now. It’s not at all glamorous, but it gets the job done. I always try to have a batch of things ready for resin because it is a little bit of an undertaking. And then I set up my area, which, get ready for it, is my second bathroom. It’s my kids’ bathroom. Now, hear me out because I know it’s a little weird to put a bathroom out of commission.
But no one actually uses it because my 4-year-old prefers “Mommy’s bathroom” and my 11-month-old is obviously still in diapers. Secondly, there’s a vent fan in there to get the fumes out of the house. Thirdly, it’s easy to warm up such a small room for ideal application of resin. I just use a small portable heater. Fourth, it has a lock, so I can keep the littles out of there while things are curing. Fifth, there’s not much fabric in there that would cause an issue with lint in my resin.
I really only shut it down for the first 24 hours of the cure, until things are dry to the touch. Then they can come out to my drying racks. While things are in the bathroom, I put them on a LACK table from Ikea.
So if you’re looking for somewhere to resin but don’t think you have anywhere, just keep an open mind and get a little creative!
Remove Excess Resin from your Coasters
There’s a few ways to remove the resin drips that will form on the bottom of your coasters.
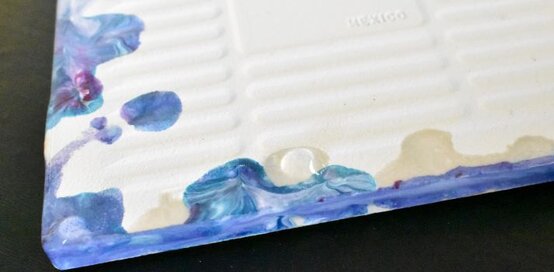
The first way is you can be diligent with a Popsicle stick while things are are still wet, running it around the bottom edge of the coaster to remove the drips. This is the easiest way. But if you don’t want to babysit your resin or you have a lot of things that you’ve resined, it’s not always the most practical.
The second way to remove the resin drips from the bottom of your coasters is to sand them off. If you’re going to do this, you should wear a respirator because breathing resin dust in is terrible for you. I imagine it’s also pretty time consuming. For these two reasons, I’ve never actually used this method.
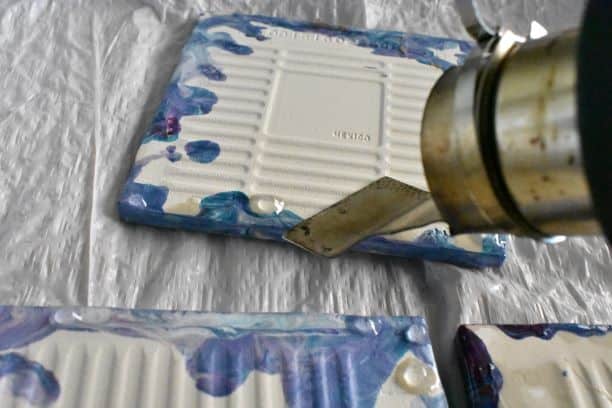
My favorite method is to actually use the heat gun and a flat attachment to heat up the drips and scrape it off. It goes quickly and is easy. This would be the method I would recommend, especially if you have any great deal of resining to do.

Apply Cork to the Bottom of your Coasters
Materials
- Cork
- Hot Glue
- Razor
- Cutting mat
- Straight edge
The last step I’m going to cover is how to finish your resin coasters. It’s a nice finishing touch to add cork to the bottom of coasters. Cork prevents scratching the furniture they’re sitting on and also keeps them from sliding around.
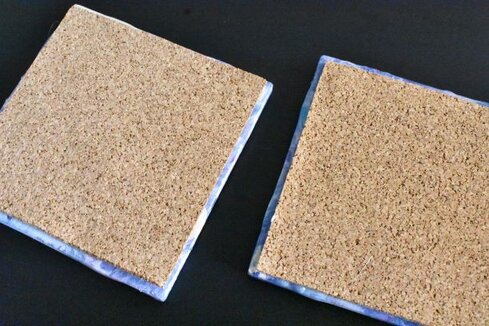
I’ve used a couple of different types of cork on my coasters, and both worked equally as well. At first, I got my cork from an automotive parts store. My husband informed me that they sell cork by the roll for people to make their own gaskets. This cork worked well, and it even came with a razor blade.
But when I decided to make coasters in bulk for holiday gifts, I needed to find an option for cork that was a little more cost effective because, if you weren’t aware, cork can be expensive. So I started using this cork from Amazon, and it works quite well.
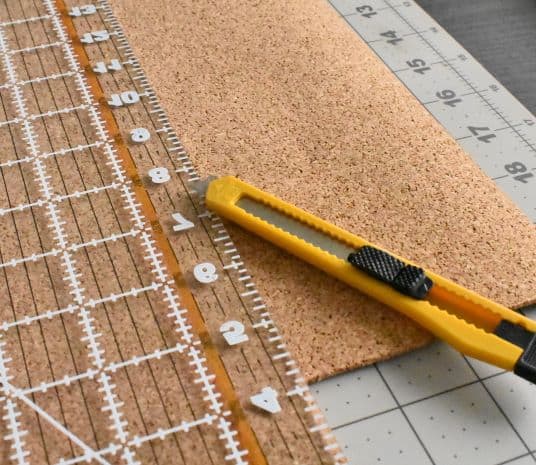
I use my cutting mat, clear ruler, and a razor blade to cut 4-inch-by-4-inch squares of cork for the back of my coasters. And to affix the cork, I use plain, old hot glue.

Go Forth and Create Coasters!
I hope this rundown on the system I’ve devised for creating and finishing the resin coasters that I make using acrylic pouring helps you create your very own resin coasters, whether they be for yourself or for gifts.
As always, check out my updates on Facebook and Instagram and feel free to peruse Homebody Hall for more fluid art tips, tricks, and tutorials! Also head over to Youtube and subscribe to get my videos sent to you as soon as they come out!!
2024 Color Palettes for Creating Updated Art
Let’s Throw a Paint Party: How to Host Your Own Paint and Sip
Do It Yourself Countertop Paint: Update Your Kitchen With Pour Paint
Want to remember these resin coasters? Be sure to pin this project to your favorite Pinterest Board!
