Some craft room ideas and inspiration for you to take and make your own, from my house to yours!
With the momentum I gained from making a decision to throw out the dining table I HATED, I got sooo much done last week!! My husband and I put our heads together and came up with a plan to rearrange things in our house so that we could make the very most of our space.
The Issue
In our home, we have two living spaces. One of the spaces we use as a living room, where we have the TV. The other space, which spans about a quarter of the house, we divided up into the playroom and the craft room.

But, truth be told, it just wasn’t working. People (ahem, kids) were always getting into my stuff. There wasn’t enough room for things to be stored in an efficient manner to where I could see and access my supplies. And there wasn’t actually enough space for me to do anything in there. I always had to get my supplies and take them into the dining area and then traipse them back again. Super inconvenient!
The Solution
So we decided to actually flip the space and use the area that was the craft room for the kids’ playroom and vice versa. This would mean that no one would have to walk through my craft area to get to the playroom and there would be more usable work space.

Since we were essentially moving everything, my husband and I decided that now was the time to paint, which we hadn’t done at all, in this house, with the exception of the baby’s room. We also decided that if we were going to set up a new work space for me, we were going to do it right and get things that would maximize the efficiency of the space. Plus, I made sure to get things that I could transition easily to my “she shed,” when it’s finished.
Here are the highlights of my craft room and ideas you should think about for your space too!
Craft Room Idea #1: Think about your work surface
I already had this massive desk that a family member had given me, but it was shoved into the corner of the space and ended up being a catchall for everything. So I was never truly able to use it as a work space.
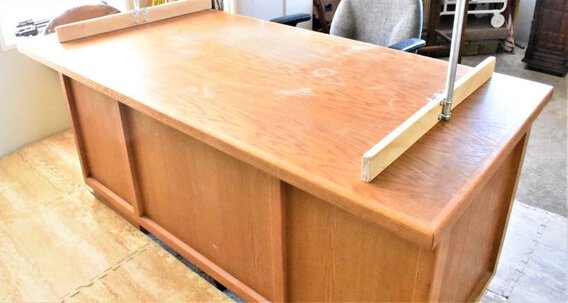
In my new craft room, I made sure to position it in such a manner that I could move around the desk. Especially when I work on bigger projects, I really like to be able to move all the way around the project, so this was very important to me in my new craft room.
(If your curious about the contraption on top of my desk, check out this post about my DIY Overhead Camera Mount!)
Craft Room Idea #2: Consider shelving
In my old space, I had all of my stuff put away in different boxes and containers, and I really wasn’t able to access it. And when it came to putting things away, I felt like I was always just shoving stuff back in the area because I didn’t have an easy way to put things back. So things were disorganized, and I would loose supplies.
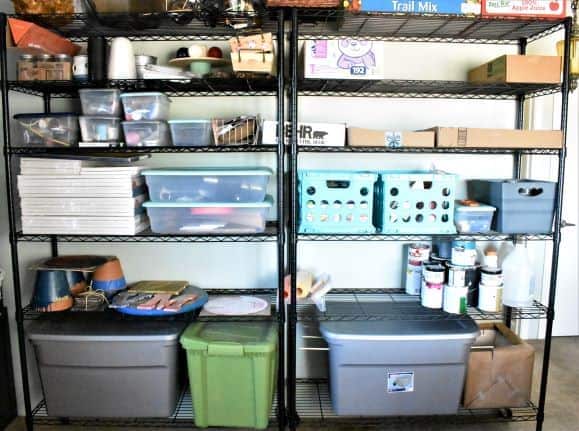
For my new craft room, I wanted to be sure to have plenty of shelving. So I went with these shelves. They are 82 inches tall, 48 inches wide, and 18 deep. And I got two of them to basically have an entire wall of shelving. Storage is king to me, so I am very excited to have plenty of it, even taking advantage of the full height of the room.
Craft Room Idea #3: Could you benefit from a drying space?
Since I paint quite a bit and have things that need to dry and cure, it was essential that I have enough shelving and space to have designated areas for projects in different phases. In my old craft room, this space was limited to the desktop. Therefore, when I had things drying, I couldn’t use the desk. And when things I piled up on the desk, I couldn’t lay things out to dry. I was just trying to do too many things with one surface.
In my new craft room, I made sure to install enough shelving that I could use some of it as a drying rack. Just for the purpose of drying, I left three shelves on one of the units empty, with the exception of the shallow cardboard boxes that I use for drying. Then I have one shelf for projects that are dry but are still in progress. This way, I can see what needs to get done, and all of my current projects are in one spot.
Craft Room Idea #4: Plan for floor space
In my old craft room area, I had to account for a walkway to get to the playroom. Now that I don’t have to do that, I actually have floor space. And while this may not even be on other people’s radar, it is for me because I LOVE to be able to work on the floor when I have a big project, especially a larger sewing project, like curtains. It’s also just nice to be able to move about freely in the space, so much less claustrophobic!
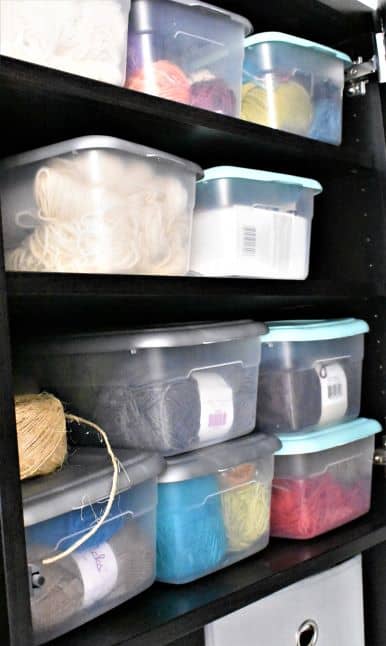
Craft Room Idea #5: Stock up on containers
Y’all, containers are my jam. I love them so much. It’s so satisfying when everything has its own spot. And then, when you use clear containers and can see everything, total bliss! Also, one of the great things about these shelving units that I chose is that you can decide where you want the shelves. So on the bottom, I made room for my big containers, and then the smaller containers fit nicely on the shelves above. You can really customize these shelves to work just for you, the supplies that you use, and your storage and organization needs.
Craft Room Idea #6: Don’t forget about your floor covering
The flooring situation has really been something that has held me back with respect to my craft room in this house. We have carpet everywhere except the kitchen and dining and the bathrooms. And I am not a clean crafter, so to speak. That’s one of the reasons why I always did my work in the dining area.
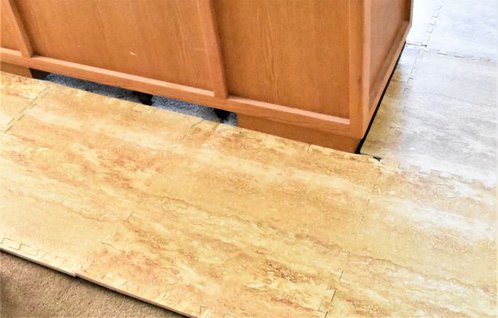
But when reconfiguring my craft room area, I really wanted to be able to work in the space, not just store stuff. So I had to come up with some craft room ideas for floor coverings and something that I could do to protect the floors. And what I came up with was these foam mats. I fit them around my work table, cutting them where I needed, and now I have an easily cleaned floor covering to work atop. As a bonus, it will be great for standing on with all that cushion!
Go Forth and Plan your Space!
While not complete, I am totally thrilled with my new craft room and can’t wait to get to work on all of my ideas! I’m planning on using contact paper to refinish the top of the desk, and I will be making some window treatments for the craft room/playroom area. So keep an eye out for those posts to come!
I hope this post has inspired you and given you some ideas on what to think about for your own craft room or space. Be sure to think about your work surface and your movement around it, shelving, organization, floor coverings, floor space, and a drying area and how these things fit into your workflow and craft room needs. And don’t be afraid to try new things out and change things. Keep trying new craft room ideas until you find what works for you!
As always, check out my updates on Facebook and Instagram and feel free to peruse Homebody Hall for more ideas on how to make your house a home, on a budget! Happy creating!
No post found!
Want to remember these considerations for your craft space? Be sure to pin these tips to your favorite Pinterest board!