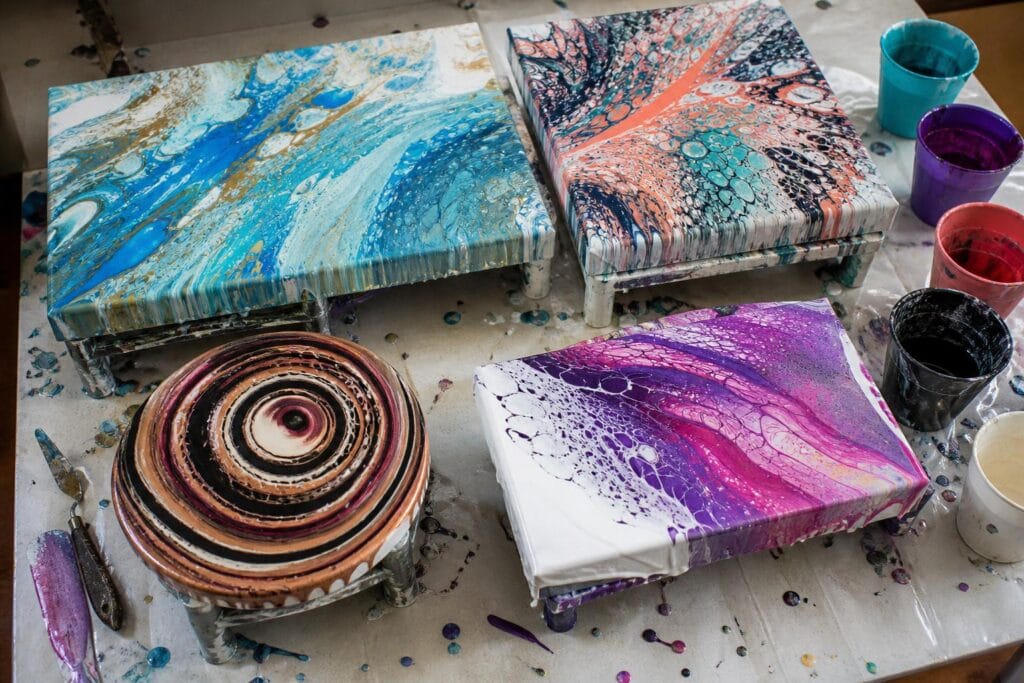
Choosing a canvas for acrylic pouring is not simply a matter of grabbing whatever size happens to be on sale. The surface affects how far your paint travels, how quickly your composition becomes crowded, and whether the finished piece stays flat as it dries.
I learned this after putting a large flip cup mixture onto a small, lightweight canvas. The colors looked promising when I lifted the cup, but there was nowhere for the paint to go. By the time I covered the corners, most of the cells had stretched into long, tired shapes. The thin stretcher bars also warped during drying. That pour taught me that canvas choice is part of the technique, not just a place to put the paint.
Why Your Canvas Changes the Way a Pour Behaves
Acrylic pouring paint moves according to gravity, momentum, and available space. A small canvas forces the paint to reach an edge quickly. A large canvas gives patterns more room to open, but it also requires enough paint to maintain coverage without excessive tilting.
Canvas tension matters too. When a stretched canvas is loose, the center can dip under the weight of wet paint. Fluid acrylic collects in that low area, pulling cells and lines inward. I have noticed this most clearly with ring pours. A ring may begin with beautifully controlled curves, then slowly slide toward the center depression while drying.
Canvas depth affects the finished appearance more than the paint movement. Standard depth canvases are economical and easy to store. Gallery depth canvases feel more substantial and give dripping paint a wider edge to cover. I prefer gallery depth for pieces intended to hang without a frame, but standard depth is usually the more practical choice for beginners who are still experimenting.
The Best Canvas Types for Popular Pouring Techniques
Flip Cups and Dirty Pours
A medium square or rectangular stretched canvas is my favorite starting point for flip cups and dirty pours. A 10 by 10 inch or 11 by 14 inch canvas provides enough room to tilt without requiring an intimidating amount of paint.
These techniques can become muddy when too much paint is trapped on a small surface. One mistake I see often is choosing a tiny canvas because it seems less wasteful, then loading the cup with five or six colors. The paint may cover the surface easily, but the patterns have no space to develop. Use fewer colors on small canvases, or move to a medium canvas when you want more layered color.
Dutch Pours
Dutch pours benefit from open space. A rectangular canvas gives the blown paint room to travel, especially when you want a sweeping composition rather than a central flower shape. I like 12 by 16 inch and 16 by 20 inch canvases for this technique.
Choose a firmly stretched surface. Airflow can push a surprising amount of paint toward one area, and a sagging center encourages the colors to pool. Canvas panels are less likely to dip, but their edges do not create the same polished presentation. For practice, panels are useful. For a finished Dutch pour, I usually choose a well braced stretched canvas.
Swipes
Swipes work well on rectangles because the swipe tool can travel in one deliberate direction. A long canvas is especially useful for wave inspired swipes and feathered compositions. The tradeoff is that long canvases are more difficult to level. Even a slight slope can make the swipe color creep toward one end.
For a first swipe, I recommend an 11 by 14 inch stretched canvas rather than a narrow panoramic shape. The proportions are forgiving, the paint volume is manageable, and you can practice maintaining even pressure before dealing with a very long swipe.
Ring Pours and Tree Rings
Square canvases support the natural symmetry of ring pours. Circles and concentric lines can expand evenly without immediately colliding with a short edge. Round canvases look tempting, but I do not consider them the easiest beginner option. Tilting a round surface while preserving the center takes more control, and gripping the edge without touching wet paint can be awkward.
What surprised me most was how much better my tree rings looked when I used a rigid panel for practice. The flat surface kept the rings from drifting while I learned to pour slowly. Once my hand control improved, I returned to stretched canvas with much better results.
Puddle Pours and Open Cup Pours
Puddle pours can work on almost any shape, but the canvas should match the intended composition. A square surface suits a central bloom. A rectangle supports several overlapping puddles or a diagonal arrangement. Open cup pours need more room because the cup pushes paint outward as it moves. On a small canvas, the cup can reach an edge before the pattern has fully formed.
Matching Size, Shape, and Depth to Your Project
Before mixing paint, I ask myself three questions.
- Will the technique expand from the center or travel across the surface?
- How much tilting, blowing, or swiping will be needed?
- Do I want the edges to become part of the finished artwork?
For expanding techniques such as ring pours and flip cups, square canvases provide balanced travel in every direction. For techniques with directional movement, including Dutch pours and swipes, rectangles usually make composition easier.
Large canvases can showcase detail, but they magnify consistency problems. Paint that is slightly too thick may stop before reaching the edges. Paint that is too thin may race off the surface and leave weak color behind. In my experience, beginners learn faster on medium canvases because there is enough room to observe movement without mixing a huge batch of paint.
If you want to pour larger than 16 by 20 inches, inspect the back first. Look for a center support bar and sturdy corner construction. Acrylic pouring places far more wet weight on a canvas than brush painting does.
Common Canvas Problems and Simple Fixes
Why Is Paint Pooling in the Center?
The canvas is probably loose, overloaded, or both. Before pouring, lightly tap the surface and check for excessive bounce. Canvas keys can tighten some frames. You can also place a clean support beneath the center while working, but make sure it sits level and does not press hard enough to create a raised spot.
Why Did the Canvas Warp While Drying?
Lightweight stretcher bars can twist under heavy paint, especially when one side receives more runoff than the other. Use a sturdier canvas, reduce unnecessary paint volume, and dry the piece on a completely level surface. I also check that no dried paint is sticking the canvas to a cup or support, since that can pull one corner downward.
Can I Use Canvas Panels for Acrylic Pouring?
Yes. Panels are excellent for practicing color combinations, testing consistencies, and learning controlled pours. They remain flat and cost less than many stretched canvases. Their main limitation is presentation. They usually need a frame or another mounting solution, and paint buildup along the thin edges can look untidy.
Should I Prime a Store Bought Canvas?
Most prepared canvases can accept a pour as they are, but I often add a thin, even base coat when the weave feels rough or absorbent. This helps fluid paint glide rather than catch in tiny dry patches. Let any added primer or base preparation dry fully before beginning the actual pour.
The right canvas will not rescue an unbalanced paint mixture, but it gives your technique a fair chance to work. Start with a firm, medium sized stretched canvas in a simple square or rectangle. Learn how your paint moves there, then explore deep edges, circles, panels, and panoramic shapes when those surfaces serve a specific idea. That approach is less flashy than buying unusual canvases immediately, but it creates far more confidence at the pouring table.
