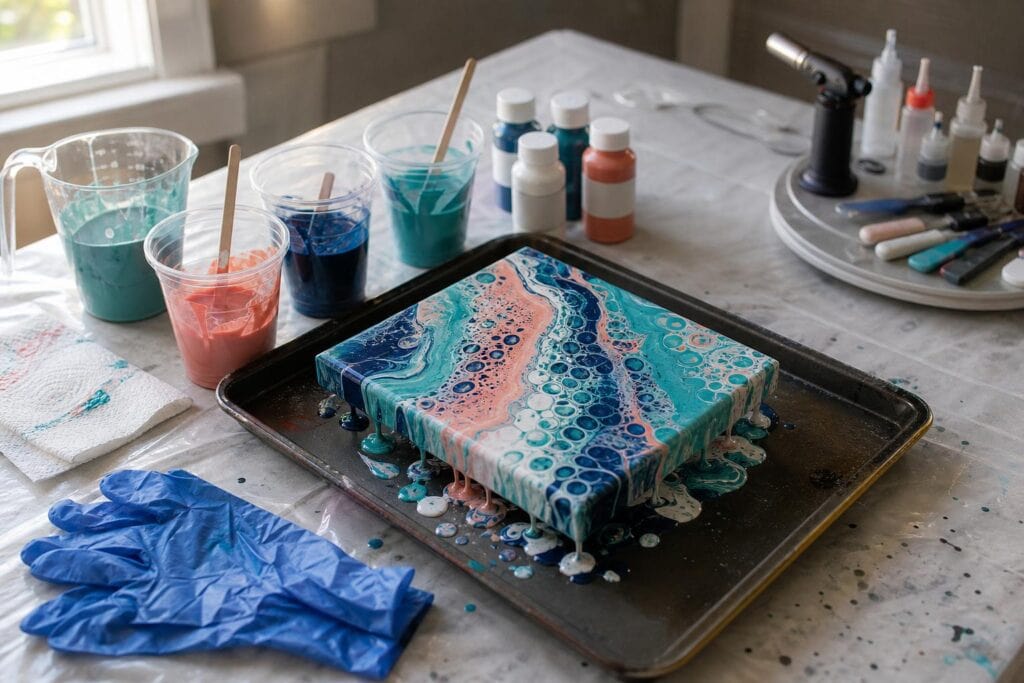
When I started acrylic pouring, I assumed every interesting pour required a special cup, gadget, or finishing tool. I collected silicone, strainers, combs, tiny spatulas, and more cups than any reasonable person needs. Some were eventually useful. Many sat untouched while I kept reaching for the same simple supplies.
I eventually realized that beginners do not need more tools. They need enough room to learn paint consistency, color interaction, and how paint moves across a surface. A specialty tool cannot rescue muddy colors or paint that is too thick to flow.
If you are preparing for your first acrylic pour, you can begin with a surprisingly short supply list. Skipping the extras gives you fewer variables to manage and more attention for the parts of fluid art that actually build confidence.
The Few Tools You Actually Need for Your First Acrylic Pour
For a first project, I recommend a simple dirty pour or open cup pour. Both techniques let you observe how layered colors emerge without making you coordinate several tools at once.
Here is what I consider a practical starter setup:
- A small level painting surface. A canvas, wood panel, or sealed ceramic tile will work. An eight inch or ten inch surface is much easier to cover than a large canvas while you are still judging paint quantity.
- Acrylic paint in three or four colors. Choose paints from the same general product line when possible. Mixing very different paint bodies can make consistency harder to judge.
- A pouring medium. Use one reliable medium rather than combining several recipes. Premixed pouring paint is also a perfectly reasonable beginner option.
- Plain cups. You need one cup for each color and one larger cup if you are layering a dirty pour.
- Stirring sticks. Craft sticks are convenient, but washable spoons work too.
- Gloves and a protected work surface. Acrylic paint travels farther than expected once you begin tilting.
- A way to raise the painting. Four cups placed beneath a canvas keep it out of the runoff.
A small level is helpful, although a phone level can do the job. I have noticed that a slightly tilted table causes more frustration than the absence of almost any specialty tool. The pour may look balanced at first, then slowly migrate toward one corner while it dries.
Popular Acrylic Pouring Tools You Can Skip for Now
A Butane Torch
Torches are often presented as essential because heat can bring bubbles to the surface and encourage certain cell effects. I do not think a torch belongs on a first pour supply list.
A torch adds fire, fuel, timing, and surface safety to a process that already has several moving parts. Too much heat can scorch paint, damage a canvas, or create a skin before the pour has finished moving. Let mixed paint rest for a few minutes and pop obvious surface bubbles with a toothpick instead.
If you later decide that cells are central to your style, you can learn careful torch use with proper ventilation and a heat safe workspace. For now, it is an unnecessary complication.
Split Cups and Funnel Pour Tools
Split cups produce beautiful ribbons and controlled color placement, but they do not automatically improve a composition. In my experience, they are most satisfying after you understand how quickly your chosen paint flows and how colors spread during tilting.
I bought specialty cups before I could consistently mix matching paint consistencies. The divided chambers created tidy streams, but those streams quickly distorted because one color flowed faster than the others. A basic cup taught me more.
Acrylic Pouring Spinners
Spinners are fun, especially for blooms and radial compositions. They also change the amount of paint you need and the speed at which paint leaves the surface. A beginner can easily spin away the most interesting part of a design.
The tradeoff is control. A spinner gives you energetic movement, but hand tilting lets you pause, inspect the composition, and decide which area to stretch next. I recommend learning to tilt first because that skill transfers to nearly every acrylic pouring technique.
Silicone Oil and Cell Activators
Silicone is not a tool, but it often appears in beginner kits as though every pour needs it. It does not. Silicone can create cells, yet it also adds cleanup and may interfere with varnish or resin if residue remains on the finished painting.
One mistake I see often is adding silicone to every color and then applying too much heat. The result can be a crowded field of tiny cells with no quiet space for the eye to rest. Learn what your paints do without additives before deciding that you need more cell activity.
Combs, Swiping Tools, and Decorative Gadgets
Specialty combs and swipe tools can wait until you want to explore a particular effect. An old store card, a piece of firm plastic packaging, or a damp paper towel can handle early swipe experiments. The paint consistency and pressure matter more than the branded edge.
Household Alternatives That Work Surprisingly Well
My pouring table still includes ordinary objects because they are easy to replace and often work better than expected.
- Plastic food containers can hold runoff or elevate small panels.
- Measuring spoons help repeat small paint mixtures without purchasing a scale.
- Bamboo skewers can pop bubbles, clear cup edges, and refine a tiny section of a composition.
- Old loyalty cards make excellent swipe tools and paint scrapers.
- Clean squeeze bottles are useful for storing a base color once you begin pouring regularly.
- A cardboard box placed over a finished pour helps protect wet paint from dust and curious pets.
What surprised me most was how rarely an expensive tool solved the issue I thought it would solve. When a pour lacked cells, the real problem was often overly thick paint. When a ribbon pour lost its shape, the colors had inconsistent flow. When the composition stretched awkwardly, I had used too little paint and was forcing it toward the corners.
How to Add Tools as Your Pouring Style Grows
Buy a new tool to answer a specific creative question, not because it appears in a supply roundup.
After several basic pours, look at what you enjoyed. If you love concentric rings and controlled ribbons, a split cup may be worthwhile. If you enjoy blooms and outward movement, consider a spinner. If large bubbles repeatedly remain in your paint, you might explore a heat tool after learning the necessary safety precautions.
Add one new variable at a time. Use the same paint brand, colors, medium, and surface while testing the tool. This makes it much easier to see what the tool actually changed. I learned this after trying a new pouring medium, silicone recipe, and split cup in the same session. The result was interesting, but I had no idea which choice caused which effect.
Troubleshooting a Simple Starter Setup
My Paint Will Not Reach the Corners
Do not assume you need a spinner. You may need more paint or a slightly thinner consistency. Check that the paint leaves your stir stick in a smooth stream and blends back into the cup without sitting in a stiff mound.
I Am Not Getting Dramatic Cells
Cells depend on paint density, consistency, layering, additives, and movement. They are not proof that a pour succeeded. Focus first on attractive color separation and a composition you enjoy. Natural cells often appear without silicone.
My Pour Looks Muddy
No gadget will separate colors that have been overmixed. Use fewer colors, avoid placing complementary colors directly beside each other in the cup, and stop tilting once the surface is covered and the composition has a clear focal area.
When Is a Specialty Tool Worth Buying?
It is worth buying when you can name the effect you want and understand the basic paint behavior behind it. Until then, use simple cups, a level surface, and your own observations. Those early pours will teach you far more than a crowded cart of tools ever could.
