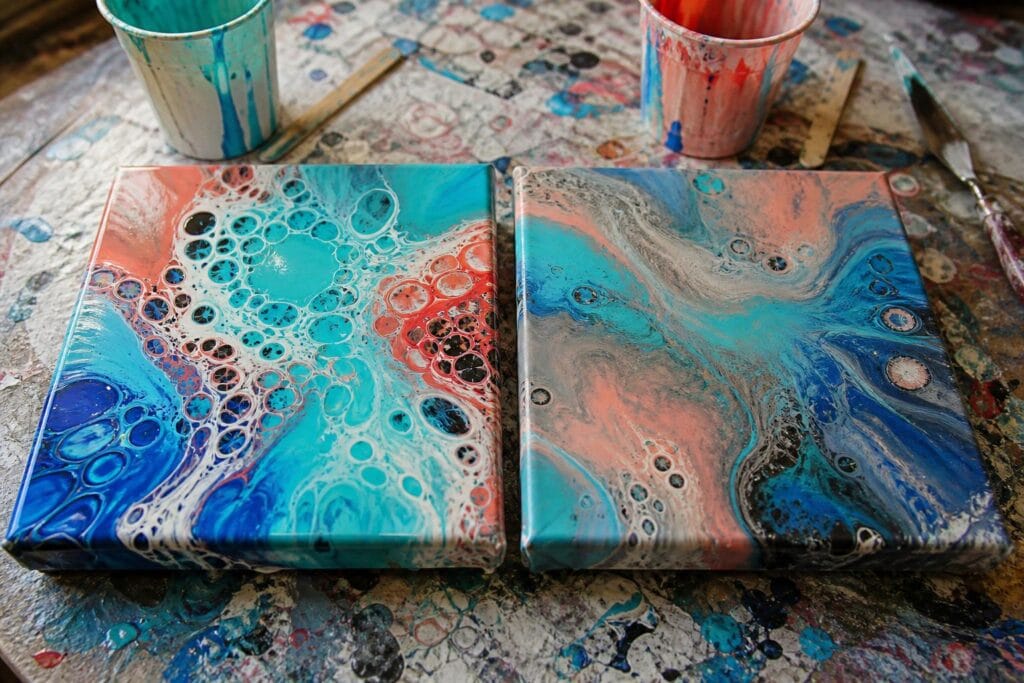
You finish tilting an acrylic pour, set it on the drying table, and admire a field of crisp, colorful cells. The next morning, those cells look stretched, muddy, or strangely faint. Some may have vanished completely.
I know how disappointing this can be because I have watched several beautiful pours change after I thought the composition was finished. I used to assume the problem was simply bad luck. I eventually realized that the wet painting was still moving long after I put down my torch and walked away.
Cells are not fixed shapes while acrylic paint is wet. They can continue opening, spreading, sinking, and merging as gravity, evaporation, paint density, and surface tension work through the layers. The solution is not necessarily to create more cells. It is to give the cells you already have a better chance of surviving the drying process.
Why Acrylic Pour Cells Change as the Paint Dries
Freshly poured paint can look settled while still moving beneath the surface. If the paint layer is deep, that movement may continue for hours. Heavier colors shift through lighter layers, air escapes, water evaporates, and the entire surface slowly levels.
I have noticed this most clearly in pours containing titanium white. A white cell may look sharply outlined at first, then expand and soften as the surrounding colors keep moving. In another pour, small colored cells may become covered as a heavier or more fluid layer spreads across them.
Your canvas can also influence the final pattern. Even a slight tilt on the drying table encourages paint to migrate toward one edge. The cells near that edge stretch, while those on the higher side become compressed or covered. A pour does not have to slide visibly for this to happen.
The Most Common Reasons Your Cells Disappear
Your paint is too thin
Very thin paint produces exciting movement and can create cells quickly, but the shapes often lack staying power. Their borders continue flowing into one another until the pattern becomes soft or muddy.
One mistake I see often is adding more water whenever paint does not flow easily. Water can help in small, controlled amounts, but it also reduces body and changes how the acrylic binder behaves. If every color is thinned by eye, one cup may become much more fluid than the others.
For lasting cell definition, I prefer paint that leaves a brief mound when drizzled from the mixing stick, then settles smoothly into the cup. It should flow without looking watery.
The paint layer is too deep
A thick puddle gives colors more time and space to move. Cells can grow dramatically, but they may merge before the surface begins to set. Thick paint also dries unevenly, increasing the possibility of cracks, soft centers, and distorted patterns.
I learned this after repeatedly mixing too much paint for small canvases. I thought extra paint would make tilting easier. It did, but the finished cells rarely looked as clean as they did immediately after pouring.
Use enough paint to cover the surface and edges without leaving a heavy pool in the center. Let excess paint travel off the canvas instead of trying to preserve every drop.
Your additives are doing too much
Silicone oil can encourage dramatic cells, but more silicone does not guarantee better cells. Too much can create crowded openings that merge into large, blurry patches. It can also leave oily spots that complicate cleaning and varnishing.
Overusing a torch causes a similar problem. Heat can bring up tiny cells, but repeated torching may make them expand until their borders collapse. It can also weaken the surface or scorch the paint.
My preference is restraint. For beginners, I recommend first making a small control pour without silicone. Then test a carefully measured amount in only one or two colors. Adding random squirts to every cup makes it difficult to identify what actually helped.
Your colors have mismatched consistencies
Different pigments and paint brands do not always behave the same way, even when you use identical measurements. A heavy body white may remain thick while a fluid blue becomes runny. Once poured together, the thinner color can spread over cell edges or slip underneath another layer.
Consistency matters more than forcing every cup to follow the same recipe. Check each mixed color from the end of a craft stick. Adjust slowly until the colors flow at a similar speed.
The drying conditions encourage movement
A warm room, direct fan, sunny window, or uneven drying surface can alter your cells. Strong airflow may skin the top before the deeper paint has settled. Meanwhile, a cold or humid room can keep a thick pour mobile for much longer.
Place the painting on a level surface away from direct air and strong temperature changes. Cover it with a clean box or raised dust cover that does not touch the paint. I check the level in both directions before every pour because guessing by sight has betrayed me more than once.
How I Keep Cells Defined From Pour to Dry Finish
- Mix each color to a similar flowing consistency. Watch how it falls from the stick rather than relying only on measured ratios.
- Use a moderate amount of paint. Tilt until the surface is covered, then allow heavy excess to run off.
- Stop manipulating the composition sooner. Every extra tilt stretches cell walls and blends neighboring colors.
- Use silicone and heat sparingly. Give natural pigment movement time to work before adding more intervention.
- Level the drying surface. Support the canvas securely at all four corners and confirm the surface with a small level.
- Photograph the wet pour. Compare that image with the dry painting so you can identify whether cells expanded, sank, merged, or migrated.
There is a tradeoff here. Large, dramatic cells usually require more movement, but more movement also makes the final result less predictable. I would rather have fewer well defined cells than hundreds of tiny cells that blur together during drying.
Simple Cell Tests and Troubleshooting Fixes
Use small tiles, canvas boards, or sealed sample panels to test one variable at a time. Mix enough paint for several samples so the base recipe stays consistent.
Try this three sample test
- Pour one sample with no silicone and no torch.
- Pour one with a small measured amount of silicone in a single color.
- Pour one with the same silicone amount and one brief torch pass.
Photograph all three immediately and again after drying. What surprised me most when I began doing this was how often the quietest wet sample produced the cleanest dry result.
If the cells blur
Thicken the next batch slightly, reduce water, use less paint, and stop tilting earlier.
If the cells merge into large patches
Reduce silicone, avoid repeated torching, and leave more negative space between active colors.
If the cells move toward one edge
Check the drying surface and inspect whether paint is pooling in the center or along a side.
If cells never appear
Do not immediately add more silicone. First check whether the paint is too thick to move or whether every color has nearly identical density and behavior. A small swipe test can reveal whether one color will travel through another more effectively.
Questions Acrylic Pour Beginners Often Ask
Can vanished cells come back while drying?
Occasionally new cells appear as lower layers rise, but a cell that has been covered or blended usually will not return with its original definition.
Should I torch the pour again after it starts drying?
No. Once the surface begins setting, additional heat can damage the acrylic film and create uneven textures. Finish any brief torching while the pour is fully wet.
Will varnish restore faded cell edges?
Varnish can deepen colors and add visual contrast, but it cannot rebuild cell boundaries that blended during drying. Treat varnish as a finish, not a cell repair method.
Acrylic pouring always contains an element of movement and surprise. The goal is not to freeze every wet detail perfectly. It is to understand which choices give your favorite cells enough structure to remain visible. A few small tests will teach you far more than adding another unmeasured ingredient to the next full canvas.
