Acrylic painting is one of the most versatile and beginner-friendly mediums out there. Whether you’re just getting started or looking to refine your skills, acrylics offer a world of creative possibilities. Acrylic paints dry quickly, layer beautifully, and work on a variety of surfaces, making them an excellent choice for both beginners and seasoned artists alike. But, exactly what is acrylic painting, and how do you get started? In this guide, we’ll explore what acrylic painting is, key techniques to try, and the essential tools you’ll need to get started.
What Is Acrylic Painting?
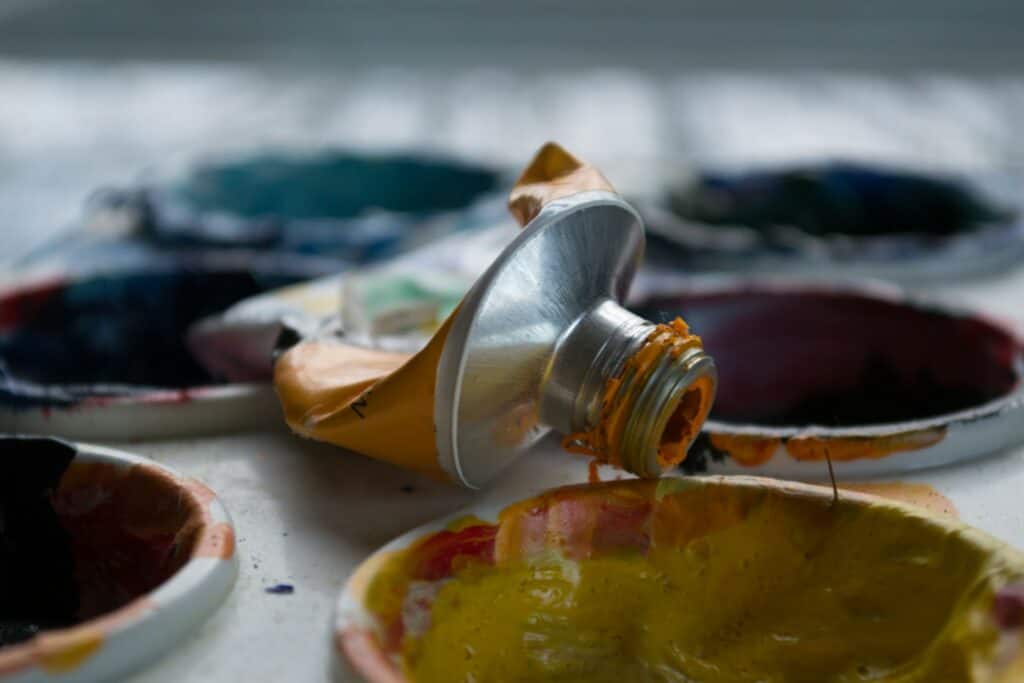
Acrylic painting involves using pigments suspended in an acrylic polymer emulsion. This means the paint dries fast, is water-soluble when wet, and becomes water-resistant once dry. Unlike oil paints, which take days to cure, acrylics allow you to work quickly, making them ideal for layering and experimentation. They can also be used thick like oils or thinned down like watercolors, giving you a wide range of creative control. Acrylic paints come in thousands of colors, and they are relatively inexpensive.
What is Acrylic Painting: Essential Techniques
Using water-soluble acrylic paints has plenty of benefits. They are highly adaptable paints. Here are just a few of the many techniques you can explore on your new acrylic painting journey.
1. Dry Brush
Dry brushing is a technique where you use a dry or slightly damp brush with very little paint. With a light hand, you dust or swipe the paint into place. Instead of fully covering the surface, the paint catches on the raised areas, creating a scratchy, textured effect. This technique is perfect for adding highlights, rough textures, or a sense of movement in landscapes and abstract pieces.
2. Glazing
Glazing is the process of applying thin, transparent layers of acrylic paint over a dry layer to build depth and luminosity. You can achieve this effect by mixing acrylic paint with a glazing medium, which extends drying time and enhances transparency. Glazing is often used in portraits and realistic paintings to create smooth transitions of color and shadow. It’s how you get that da Vinci glow!
3. Blending
Blending is essential for creating smooth gradients and soft transitions between colors. Acrylic paint dries quickly, so blending requires a fast hand. One way to extend the blending time is by using a slow-drying medium or misting the paint lightly with water. Brushes with soft bristles and a gentle touch work best for achieving a smooth finish. Blending is useful for painting skies, skin tones, and delicate shadows.
4. Impasto
Impasto is a technique where thick layers of paint are applied to the canvas using a brush or palette knife. This creates a three-dimensional, textured effect that can add movement and drama to a painting. The thick paint holds brushstrokes and knife marks, making this technique ideal for expressive works or highlighting focal points.
There are thicker acrylic concoctions on the market, but they are more expensive than your typical craft acrylic. You can produce your own impasto blends by adding a silicon caulk or artist thickening medium like Liquithick.
5. Stippling
Stippling involves applying small dots or dabs of paint to build up shading, texture, or patterns. This technique can be done with a brush, sponge, or even the tip of a palette knife. Stippling is often used to create depth in foliage, fabric, and fur, as well as for adding highlights in a controlled manner.
6. Scumbling
Scumbling is a dry-brush technique where an opaque or semi-opaque color is lightly brushed over a dry underpainting. This allows some of the underlying color to show through, creating a softened, hazy effect. Scumbling is useful for painting atmospheric effects, such as mist, clouds, or aged surfaces.
For instance, let’s say you have painted a portrait, but you want to give it that aged Renaissance look. You could take a wash of Burnt Sienna acrylic paint, thinned with water or glaze, and do a stumbling over your dried work to give the entire painting a vintage tone.
7. Pouring
Acrylic pouring is a fun and experimental technique that involves mixing paint with a pouring medium like Floetrol and then pouring it onto the canvas. We are big fans of acrylic pouring around here, and we think it’s a great way for newbies to start exploring the properties of acrylic paint.
The paint spreads and interacts in unpredictable ways, creating stunning marbled and fluid designs. This technique requires a level surface and patience, as the paint needs time to settle and dry. If you’re interested in paint pouring, check out “Easy Paintings for Beginners.”
8. Underpainting
Underpainting is the practice of creating a monochromatic base layer before applying final colors. This helps define values and composition early on, making the painting process smoother. Acrylics work well for underpainting because they dry fast, allowing you to quickly build layers.
For high-contrast or moody paintings, consider a matte black background. In modern, crisp art, go with white. For a vintage or ethereal piece, go with Burnt Sienna.
9. Sgraffito
Sgraffito is a technique where you scratch through a layer of wet paint to reveal the color underneath. This can be done with a palette knife, the end of a brush, or any sharp tool. Sgraffito adds detail and texture, often used for fur, hair, or abstract effects. It can also create a graffiti-like effect for modern art pieces.
10. Sponging
Sponging is a technique that uses a sponge to dab paint onto the canvas, creating a textured, natural effect. It is commonly used in backgrounds, foliage, and cloud formations. Different types of sponges produce varying effects, from soft, airy textures to bold, defined marks.
Must-Have Acrylic Painting Tools for Beginners

If you’re just starting out, having the right tools makes all the difference. We don’t recommend spending a fortune though. You will find your own groove over time and discover the techniques and products you like most, so in the beginning just start with craft-level products. Once you master the techniques, then move on to a few higher-level brushes and mediums. Here are some essentials to get you started:
Tools to Get You Started
- Acrylic Paints – Start with a basic set of primary colors (red, blue, yellow), white, and black. You can mix most shades from these. There are plenty of great starter kits on Amazon, or just go to Hobby Lobby and grab 10 shades of pre-made bottled acrylics.
- Brushes – Get a variety, including flat, round, filbert, and fan brushes for different effects. Again, your craft store sells inexpensive multi-packs that are perfect for beginners to get a feel of each brush and its capabilities.
- Canvas or Acrylic Paper – Canvases are traditional, but acrylic paper is great for practice and easy storage. As a beginner, purchase the cheaper canvas boards to practice on. Once you’re ready to create a hanging piece, then you can look into thicker pre-made canvases or stretch your own.
- Palette – A plastic or glass palette works well for mixing colors. A piece of scrap wood works fine too, but some painters like the organization of paint wells.
- Palette Knife – Essential for mixing paints and applying impasto techniques. A plastic one is fine in the beginning.
- Water Container – For rinsing brushes between colors. I also like to keep a spray bottle of water around for blending.
- Rags or Paper Towels – Useful for cleaning up and creating texture.
- Gesso – A primer that preps surfaces for painting, giving better adhesion and durability. Most of your craft store canvases come pre-primed, but adding another layer of Gesso gets you a smoother finish.
- Acrylic Mediums – These include retarders (to slow drying), gloss/matte mediums (to adjust finish), thickening mediums, and pouring mediums (for fluid art). These will become part of your repertoire eventually, but I would personally master the other techniques before moving on to impasto and glazing.
Sealing Your Acrylic Painting
Once your acrylic painting is completely dry, sealing it with a protective varnish is highly recommended. This helps protect the painting from dust, UV damage, and moisture, ensuring its longevity. It also brightens and concentrates the colors beneath, giving your art a much more professional look.
Choose between gloss, satin, or matte varnishes, depending on your desired finish. Apply the varnish with a clean, soft brush, or use a spray varnish for an even coat. Make sure to work in a well-ventilated area and allow adequate drying time between coats for the best results. In the beginning, a coat of Mod Podge is a cheap way to get a matte or gloss finish that is both protective and easy to use.
What is Acrylic Painting: Final Thoughts
Acrylic painting is a fantastic way to explore your creativity without the long drying times or complicated setups of other mediums. With just a few tools and techniques, you can create bold, expressive, or delicate works of art. The key is to experiment—try different techniques, layer colors, and most importantly, have fun!
