Are you looking for a beautiful landscape or some nature scenery to adorn your walls? Well, this step-by-step waterfall painting will walk you through three different easy ways you can paint your very own waterfall painting (even as a beginner!), varying from abstract to more realistic.

Besides being beautiful, did you know that waterfall paintings are actually very popular in Feng Shui because they represent wealth? Pretty cool, maybe it would be a good painting to have in YOUR home too.
So how do you paint a waterfall? The three methods of creating a waterfall painting that I will be going through step by step are:
- Swipe
- Dirty-cup pour and waterfall pour combination
- Dirty-cup pour, swipe, and straw blowing combination
If you’re pouring for the first time and would like more explanation on materials, processes, and terms, you can head on over to my Beginner’s Guide to Acrylic Pouring. You can also head over to my Comprehensive Guide to Acrylic Pouring Techniques for more information on all of the different techniques.
What colors do you need to make a waterfall painting?
For each of these waterfall paintings, I used the same color pallet. The only major difference between the paintings is the pouring techniques that I used.
For my waterfall paintings, I used the obvious blues for water and added in some metalics for the rocks around the waterfall. (If you’re curious about colors and color theory as it relates to acrylic pouring, head on over to my post about Choosing Colors for Acrylic Pouring and grab your FREE printable Color Wheel and Color Scheme Guides.)
I chose to do a rock-like look around the waterfall, but you could add in more greens for a forest-look or add flowers or trees for embelishment. Acrylic pouring is so flexible that you can customize it to suit you and your home quite easily!
Materials You Will Need to Paint a Waterfall with Acrylic Pouring:
Paints:
- Master’s Touch Permanent Black
- Master’s Touch Ultramarine Blue
- Artist’s Loft Titanium White
- Navy Blue (Master’s Touch Permanent Black mixed with Master’s Touch Ultramarine Blue)
- Artist’s Loft Turquoise
- Artist’s Loft Metallic Cobalt Blue
- Artist’s Loft Old Gold
- Artist’s Loft Metallic Bronze
- Artist’s Loft Copper
- Artist’s Loft Raw Umber
Medium:
- Floetrol
- Water
Canvas:
- 8in x 10in canvas
Tools:
- Plastic folder cut in half
- Straw
- Baby wipe/wet paper towel
- Torch (optional)
How to Paint a Waterfall Painting Method 1: Swipe

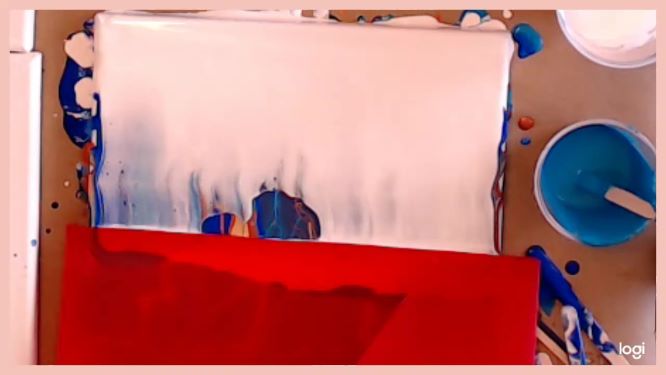
- Leaving one inch on the side of the painting you want to be the bottom empty, lay the paint down for the water. I started with the blues first and added the metalics in as an accent. The order that the paints were laid down was: ultramarine blue, navy blue, turquoise, metallic cobalt blue, copper, and old gold.
- Tilt the paint side to side and down until all of the empty spots in the water area are filled, still leaving that one inch empty.
- Fill the space you left empty with white paint.
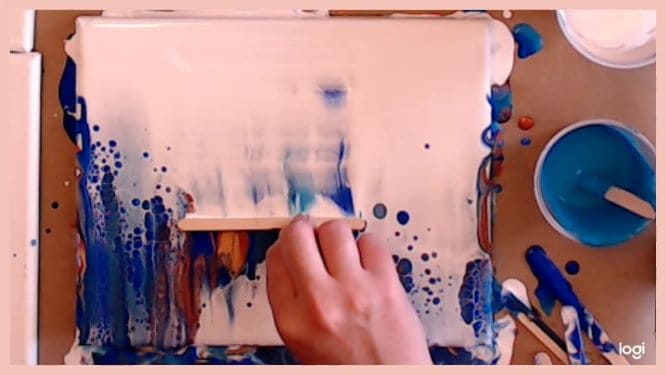
- Take the plastic folder cut in half or other swiping implement and swipe from the white strip downward, bringing a thin layer of white across the colored paint.
- Touch up your swipe as you see fit. I used a popsicle stick to touch up an area where I lost the white paint.
- Use the blow torch to bring out additional cells (optional).
- Tilt the painting until you are happy with your composition and the overall look of the waterfall painting. I tilted it toward the white so that the white space was smaller.
How to Paint a Waterfall Painting Method 2: Dirty-cup pour and waterfall pour combination

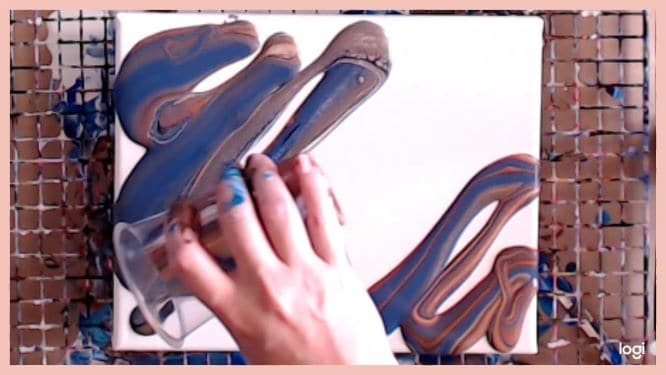
- Layer your colors in your cup for the dirty-cup pour. The order in which I put my paints in was: copper, raw umber, metallic bronze, navy blue, old gold, white, black.
- Pour the dirty-cup on two opposite sides of the canvas.
- Tilt your canvas until the two sides forming the rock frame of the waterfall are to your liking.
- Layer the paints for the waterfall part of the painting. This part is key to getting the waterfall look. Layer them from light to dark, starting with white. The order I layered my paint was: white, neon blue, turquoise, metallic cobalt blue, ultramarine blue.
- Tilt your canvas slightly so that which would be the top of the painting is higher than the bottom. At the top, pour your paint very slowly and close to the canvas, moving in a very slight, small circular motion. (See note below and second video below.)
- Continue to tilt the painting until the water has reached the bottom of the canvas.
Unfortunately, I did a TERRIBLE job with filming this one, especially this waterfall part (the irony is not lost on me!). But I love this painting so much, and I still wanted to share it with you. So I did my best to describe it for you with words, and I’m also going to add in a supplementary video by Youtube Artist Christina Welch below to show you the waterfall pour in full.
How to Paint a Waterfall Painting Method 3: Dirty-cup pour, swipe, and straw blowing combination

- Layer your colors in your cup for the dirty-cup pour that will form the landscape around the waterfall. The order in which I put my paints in was: umber, copper, old gold, navy blue, bronze, white, black.
- Pour the dirty-cup on two opposite sides of the canvas.
- Tilt your canvas until the two sides forming the rock frame of the waterfall are to your liking.
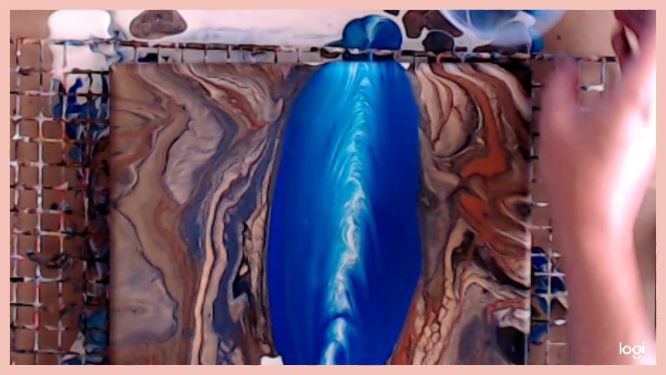
- Layer your colors in your cup for the dirty-cup pour that will form the water. The order in which I put my paints in was: ultramarine blue, turquoise, neon blue, metallic cobalt blue, white, old gold, copper.
- Tilt your canvas until the water paints fill the gap between the two sides of the landscape.
- Add white paint to the edge of the water that will be the bottom of the waterfall.
- Using a baby wipe, wet paper towel, or other swiping implement, swipe the white paint that you just added to the bottom and bring a thin layer up over the rest of your waterfall, being sure to only swipe over the water.
- To form the mist and foam, blow the edge between the white paint at the bottom and the rest of the waterfall upward with a straw.
- Continue blowing the paint in your waterfall, including at the edges between the water and the landscape, to create movement in the waterfall.
Go Forth and Pour!
And that’s all there is to it, you just created a one-of-a-kind piece of artwork and amazing rendition of nature in less than half an hour!! Way to go!
As always, check out my updates on Facebook and Instagram and feel free to peruse Homebody Hall for more fluid art tips, tricks, and tutorials! Also head over to Youtube and subscribe to get my videos sent to you as soon as they come out!!
Make an Easy Mushroom Painting with Acrylic Pouring
Cute, Simple DIY Acrylic Pouring Cactus Paintings
How to Paint Snow with Acrylic Pouring
Want to remember how to paint a waterfall painting later? Be sure to pin this tutorial to your favorite Pinterest board!


