Try this fun pour painted vinyl record DIY clock project today!

My son has always loved clocks. I don’t know what it is about clocks, but he started saying the word randomly at 18 months and has been obsessed ever since. So naturally, we as a family have a lot of clocks in the home. And when I learned of making clocks out of records, which you can come by super cheap at thrift stores, I was excited to try my hand at doing some acrylic pouring on my DIY clocks to combine my love of pouring and my son’s love of clocks.
Gesso Uh-Oh
I decided to do two clocks, one for my son’s room and one for my daughter’s room. And I decided to do an experiment to see if it was better to start with a gessoed record or a plain record for a DIY clock.
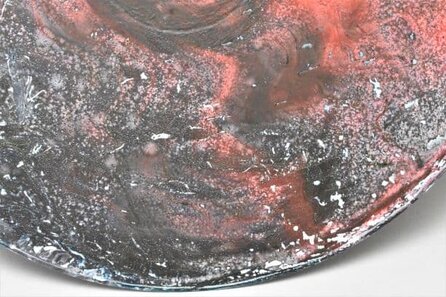
As you will see in the video, there were some hiccups with my gessoed record. It did not hold the paint well and the texture was less than desirable. So what happened? Well, I tried to make my own gesso, and I didn’t follow the recipe very well. So I’m sure that was the problem. So if you decide to try gessoing a record, I would either follow the recipe for making your own very carefully or purchase some gesso.

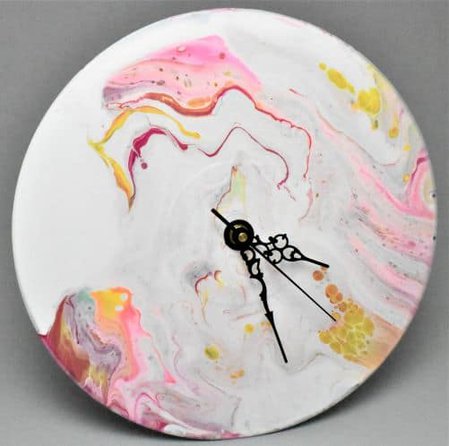
The plain record, however, did turn out quite nicely, and I ended up going ahead and finishing it up with some polyurethane and this clock mechanism.
Clock Mechanism
As far as the clock mechanism is concerned for this pour painted vinyl record DIY clock project, I recommend the size of this mechanism for your record DIY clock because the shaft isn’t too long, which I think would look awkward with such a thin clock. But the packaging wasn’t the best, and the hands were bent when I took them out of the package. So just something to be aware of when you’re looking for a clock mechanism to order.
Paints:
Record #1 (Gessoed Record)
- Artist’s Loft Neon Green
- Master’s Touch Permanent Black
- Apple Barrell Bright Blue
- Liquitex Basics Titanium White
Record #2 (Plain Record)
- Apple Barrell Canary Yellow
- Artist’s Loft Neon Green
- Liquitex Basics Quinacridone Magenta
- Artist’s Loft Neon Pink
Pouring Medium:
- Floetrol
- Water
Canvas:
- Vinyl records sourced from Goodwill
Method:
Record #1: Ring Pour
Record #2: Dirty-cup, ribbon pour
Sealant:
2 thin coats of Minwax One Coat Polyurethane applied with a foam brush
Extras:
If you’re new to pouring, head on over to my Beginner’s Guide to learn all about the art form and how to get started as well as my Comprehensive Techniques Guide to check out videos for each different technique.
And if you’re getting hung up with color or just want to learn how to choose awesome color combos, check out my post on Choosing Colors for Acrylic Pouring and sign up to receive my FREE Color Wheel and 8 Color Scheme Guides below!
As always, check out my updates on Facebook and Instagram and feel free to peruse Homebody Hall for more fluid art tips, tricks, and tutorials! Also head over to Youtube and subscribe to get my videos sent to you as soon as they come out!!
2024 Color Palettes for Creating Updated Art
Let’s Throw a Paint Party: How to Host Your Own Paint and Sip
Do It Yourself Countertop Paint: Update Your Kitchen With Pour Paint
Want to remember this DIY clock project? Be sure to pin this tutorial to your favorite Pinterest board!


