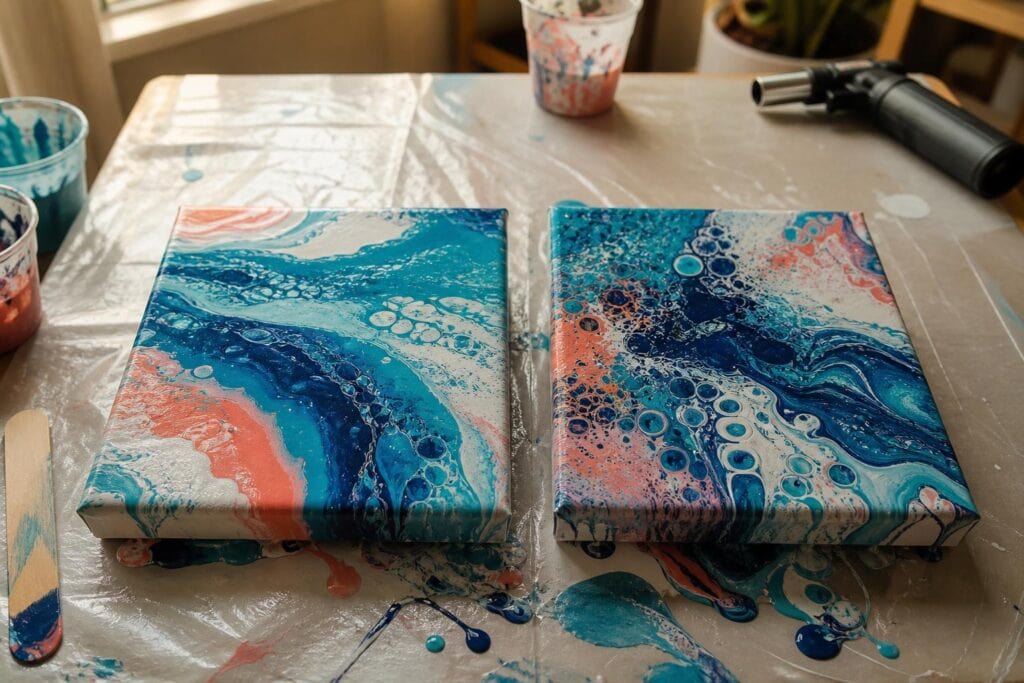
For a long time, I treated my torch as if it were part of the official acrylic pouring ceremony. Mix the paint, layer the cup, pour, tilt, and torch. I had watched so many fluid art videos where the torch appeared at the end that skipping it felt like leaving out an essential step.
I eventually realized that a torch is not a requirement. It is a problem solving tool, and some pours do not have the problem it is designed to solve.
That distinction matters because heat can release surface bubbles and encourage cells, but it can also damage paint, distort a composition, and create marks that cannot be repaired. If you are a beginner, learning when to leave your pour alone is often more valuable than learning how to wave a flame across it.
What Torching Actually Does to an Acrylic Pour
A quick pass with a torch warms the upper surface of the wet paint. This helps some trapped air expand and break through. Those tiny bubbles may have entered while you stirred pouring medium into the paint, squeezed paint from a bottle, or layered colors into a cup.
Heat can also temporarily make the surface more fluid. In a pour containing silicone oil, that extra movement may help colors separate and cells open. This is why torching is often described as a way to create cells.
However, the torch does not invent a strong cell structure from nothing. Your paint density, consistency, color order, pouring medium, silicone use, and pouring technique all play larger roles. If the recipe is not inclined to produce cells, more heat usually gives you overheated paint rather than beautiful lacing.
I have noticed that bubbles near the surface respond quickly, while deeper bubbles often remain hidden until the paint settles. Holding the flame over those stubborn areas does not reliably pull them out. It simply cooks the surface while the bubble stays underneath.
When a Torch Can Help
I am most likely to use a torch when I can clearly see small bubbles across the surface of a freshly tilted pour. This happens more often when I have mixed a thick paint color, stirred too vigorously, or used paint that was shaken shortly before pouring.
A torch can also be useful when I am intentionally encouraging cells in a silicone pour. Even then, I use it sparingly. I prefer to see what the pour is already doing before adding heat.
My practical torching routine
- Finish tilting and place the canvas on a level surface.
- Wait briefly so the paint can settle and some bubbles can rise naturally.
- Look across the surface from a low angle under good light.
- If I see bubbles, light the torch away from the canvas.
- Keep the flame several inches above the paint and move continuously.
- Make one quick pass, then stop and watch the surface.
- Repeat only where visible bubbles remain.
I never aim for a dramatic reaction. A subtle pass is enough. What surprised me most when I began using less heat was that my cells often stayed rounder and my color boundaries remained cleaner.
When I Skip the Torch
If the surface looks smooth and the composition is working, I leave it alone. There is no prize for torching a bubble free pour.
I also skip heat when I have used isopropyl alcohol or another flammable additive. A torch should never be used around exposed alcohol, solvents, paper towels carrying flammable residue, or open containers of fuel. I clear the work area before lighting a torch and keep the flame away from canvas edges, gloves, plastic cups, and protective table coverings.
Very thin paint is another reason to be cautious. Heat can increase movement just enough to muddy delicate ribbons or cause a carefully placed swipe to spread. On pours with fine lacing, a torch may open cells so aggressively that the pattern loses definition.
I tend to skip torching on small canvases too. There is less room for the heat to dissipate, and the paint can change quickly. The tradeoff is that I may accept an occasional tiny dried bubble. I would rather repair one pinhole later than scorch a composition I love.
Common Torching Mistakes
Holding the flame in one place
One mistake I see often is hovering over a stubborn bubble. This can form a skin, create a crater, scorch the paint, or weaken adhesion. Keep moving. If a bubble does not release after a brief pass, stop trying to force it.
Getting too close to the paint
I learned this after leaving a dull, slightly wrinkled patch in the middle of an otherwise glossy pour. I had moved the flame closer because I wanted an immediate reaction. The paint reacted, but not in the way I wanted. Start higher than you think you need to and watch carefully.
Using heat to chase bigger cells
Repeated torching can make cells expand until they become stretched, ragged, or muddy. It may also expose the base coat through the center of a cell. If cell growth is weak, adjust the recipe or color layering on your next pour instead of repeatedly heating the current one.
Using a heat gun as a direct substitute
A heat gun adds moving air as well as heat. That can push wet acrylic across the canvas, distort edges, and send paint over one side. Heat guns have a place in techniques that intentionally move paint, but I do not recommend them as a beginner bubble remover. A controlled torch pass is more precise, while no heat at all is safer.
Safer Ways to Reduce Bubbles Without a Torch
My preferred beginner approach is prevention. It is less exciting than producing a burst of cells with a flame, but it gives you more control over the finished pour.
- Stir slowly and scrape the sides and bottom of the cup rather than whipping the mixture.
- Mix paint and pouring medium ahead of time when possible. Resting the cups for several hours allows air to rise.
- Avoid shaking paint bottles immediately before mixing.
- Pour close to the cup or canvas. A long falling stream can fold extra air into the paint.
- After mixing, tap the cup gently on the table and let it sit.
- Use a clean toothpick to pop one visible bubble instead of heating the entire surface.
A fine mist of water is sometimes suggested, but I rarely recommend it. Water changes the surface and can dilute the upper layer unevenly. Spraying alcohol carries both composition and fire safety concerns. For beginners, slow mixing, resting the paint, and removing individual bubbles are more predictable.
Troubleshooting Torched Pours
Why did torching create tiny craters?
The flame may have been too close, or the surface may have contained silicone, dust, or excess additive. Stop applying heat. Let the pour level naturally rather than trying to erase every crater with more paint movement.
Why did my colors become muddy after torching?
The paint was probably already thin or heavily manipulated. Heat encouraged additional movement between neighboring colors. Use fewer passes next time and finish most of your composition before deciding whether bubbles truly require attention.
Can I torch after the paint starts drying?
I do not recommend it. Once a skin begins forming, heat can wrinkle or split it while wetter paint remains underneath. Any torching should happen while the pour is fully wet and only after obvious flammable materials have been removed.
Will skipping the torch ruin my cells?
No. Many acrylic pours develop cells through paint density, silicone, layering, and movement alone. I have had some of my cleanest cells appear without heat. Give the pour a moment before deciding it needs help.
My rule is simple: torch for a visible reason, not from habit. Look at the surface, identify the problem, and use the smallest amount of heat that solves it. Sometimes the most confident decision in acrylic pouring is setting the torch down and letting the paint finish the work.
